
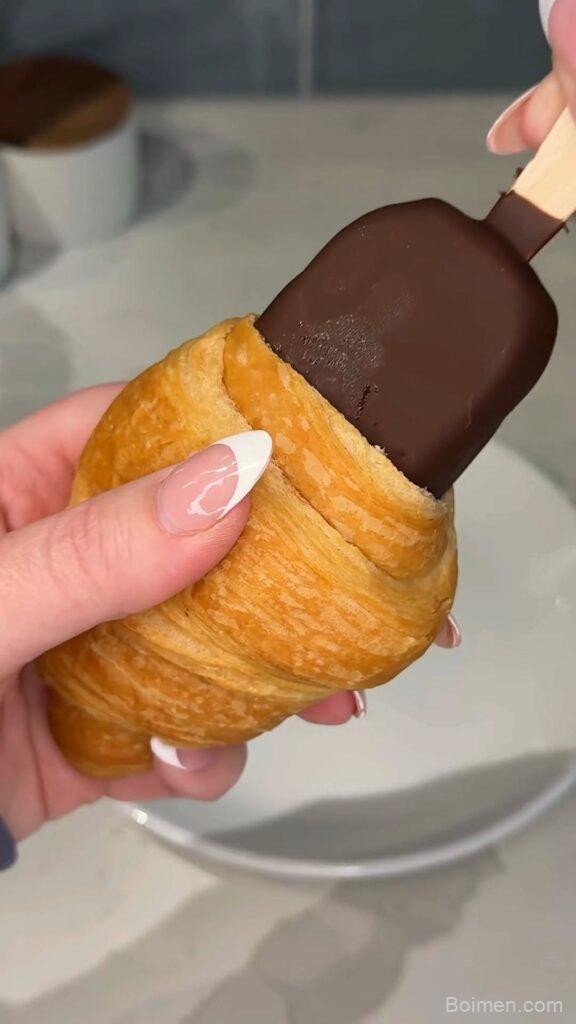
If you have been scrolling past that croissant ice cream bar on your feed, stop scrolling and start freezing! This is the dessert that broke the internet for good reason: buttery, flaky croissants pressed into a pan, layered with softened ice cream, and finished with a crackly chocolate shell. No oven, no baking, just pure frozen magic.
Advertisements1
Here is the thing about this recipe that I love most: it is basically a blank canvas. You pick the ice cream flavor, you pick the toppings, and the croissants do all the heavy lifting with their shatter-crisp layers. I tested this five times in one week (my neighbors were thrilled) and the ratio below is the one that holds together beautifully when you slice it.
The whole thing comes together in about 15 minutes of hands-on work, then the freezer does the rest. Make it tonight, slice it tomorrow, and watch people lose their minds over a dessert that started with a bakery bag and a pint of ice cream.
Why You'll Love This Recipe
About the Ingredients
6 large day-old croissants (about 10 oz / 285g total)
Day-old croissants are actually better here because they are drier and soak up the ice cream without turning to mush. In a pinch, use good-quality supermarket croissants or even stale brioche.
1 1/2 quarts (1.4L) softened vanilla ice cream
Let a standard tub sit on the counter 15 to 20 minutes until scoopable but not melted. Any flavor works – salted caramel and coffee are my two favorites.
1/2 cup (120ml) heavy cream, warmed
Warming the cream helps it blend smoothly into the chocolate for a glossy shell. Half-and-half works but gives a slightly thinner set.
8 oz (225g) semisweet chocolate, chopped
Use a bar chopped into pieces, not chocolate chips, because bars melt smoother and set firmer. Dark chocolate (70%) gives a less sweet, more grown-up finish.
3 tbsp (42g) unsalted butter
Butter keeps the chocolate shell soft enough to slice cleanly straight from the freezer. Coconut oil is a great 1:1 swap if you want a dairy-free shell.
1/4 cup (60g) creamy peanut butter
Swirl this between the ice cream layers for a salty-sweet ribbon. Almond butter or cookie butter both work beautifully.
1/3 cup (60g) mini chocolate chips
Minis distribute better and do not crack the slice. Regular chips or chopped toffee bits are fine substitutes.
1/2 cup (50g) crushed salted pretzels
The salt cuts through the sweet ice cream and adds crunch. Crushed graham crackers or toasted nuts are solid swaps.
1 tsp (5ml) vanilla extract
A little vanilla boosts the flavor of the whole bar. Skip it if your ice cream is already strongly flavored.
Flaky sea salt, for finishing
A pinch on top makes every flavor pop. Maldon or any coarse flaky salt is perfect here.
Tips & Tricks
Do Not Over-Soften The Ice Cream
If it melts fully, the bar turns icy and grainy – aim for soft-serve texture, about 15 minutes on the counter.
Press The Croissants Firmly
Really pack the layers down with the back of a measuring cup so the bar slices cleanly instead of crumbling.
Chill Between Layers
A quick 20-minute freeze between the ice cream layers keeps them from bleeding together and gives you those gorgeous stripes.
Warm Your Knife To Slice
Run a chef's knife under hot water, dry it, and slice – you will get clean, bakery-worthy cuts every single time.
Pro Tips
Step-by-Step Instructions
1. Toast The Croissants
Tear or roughly chop the croissants into 1-inch pieces and scatter them on a sheet pan. Toast in a 350F (175C) oven for 6 to 8 minutes, until the edges are golden brown and they smell nutty, then cool completely. This step keeps them from going soggy under the ice cream.
2. Line Your Pan
Line a 9×5-inch loaf pan with parchment paper, leaving a 2-inch overhang on the long sides. The overhang is your handle later, so do not skip it.
3. Build The Base
Press half the toasted croissant pieces into an even, compact layer in the bottom of the pan. Use the bottom of a measuring cup to press firmly – you want it solid, not loose.
4. Add The First Ice Cream Layer
Spoon half the softened ice cream over the croissants and spread it smooth with an offset spatula. Freeze for 20 minutes so this layer firms up before the next one goes on.
5. Swirl And Stack
Dollop the peanut butter over the chilled ice cream, then scatter the remaining croissant pieces on top. Add the rest of the ice cream and spread it level, pressing gently so everything settles together.
6. Freeze Until Firm
Cover the pan tightly with plastic wrap and freeze for at least 6 hours or overnight. The bar is ready when it is completely firm to the touch and a skewer inserted in the center comes out cold, around 0F (-18C) internal temperature.
7. Make The Chocolate Shell
Warm the heavy cream in a small saucepan over medium-low heat until it just begins to steam, about 2 minutes – do not let it boil. Pour it over the chopped chocolate and butter, let it sit 1 minute, then stir until glossy and smooth. Stir in the vanilla.
8. Coat And Finish
Lift the frozen bar out of the pan using the parchment, set it on a rack, and pour the chocolate shell over the top, letting it drip down the sides. Immediately sprinkle with mini chocolate chips, crushed pretzels, and flaky sea salt. Freeze 10 minutes to set the shell.
9. Slice And Serve
Warm a knife under hot water, dry it, and slice the bar into 6 thick pieces. Serve immediately – it softens fast, so keep leftovers in the freezer.
Delicious Variations
Cookies And Cream Bar
Use cookies-and-cream ice cream, swap the pretzels for crushed chocolate sandwich cookies, and drizzle with white chocolate.
Salted Caramel Crunch
Layer salted caramel sauce with vanilla ice cream and finish with crushed toffee bits and extra flaky salt.
Berry Cheesecake Twist
Use strawberry ice cream with a swirl of softened cream cheese and top with freeze-dried strawberries and white chocolate.
How to Store Viral Croissant Ice Cream Bar 🍦🥐 | Easy No-Bake Dessert Recipe
Refrigerator
Not recommended – the bar will soften quickly. If you must, hold it in the fridge no longer than 15 minutes before serving.
Freezer
Wrap the whole bar or individual slices tightly in plastic wrap, then foil, and freeze up to 1 month. Slices keep best stacked in an airtight container with parchment between them.
Reheating
No reheating needed. For the best texture, let slices sit at room temperature 3 to 5 minutes before eating so the croissant layers soften slightly.
Frequently Asked Questions
Q: Can I make this croissant ice cream bar ahead of time?
Yes, and you should – it needs at least 6 hours to freeze firm, so making it the night before is ideal. Wrap it tightly and it stays perfect in the freezer for up to a month.
Q: What kind of croissants should I use for this recipe?
Day-old or slightly stale croissants work best because they hold their structure under the ice cream. Fresh, soft croissants can turn mushy, so toast them first if that is all you have.
Q: Can I use a different pan size?
Absolutely – an 8×8-inch square pan works great and gives you slightly thinner bars. Just keep the layers even and freeze a bit longer, about 8 hours.
Q: How do I keep the ice cream from melting while assembling?
Work quickly and freeze between layers, and only soften the ice cream to soft-serve texture, not fully melted. If it starts to slump, pop the pan back in the freezer for 15 minutes.
Q: Is this croissant ice cream bar gluten-free?
Not as written, since croissants contain wheat. You can swap in gluten-free croissants or gluten-free graham crackers for the layers, and check that your chocolate and pretzels are certified gluten-free.
I cannot wait for you to make this viral croissant ice cream bar and see the reactions at your table. Snap a photo of your slice, tag me, and tell me which ice cream flavor you chose – I am always looking for the next great combo. Cook smart, eat happy.

Viral Croissant Ice Cream Bar 🍦🥐 | Easy No-Bake Dessert Recipe
This viral croissant ice cream bar turns flaky croissants and creamy ice cream into an easy no-bake dessert everyone begs for all summer.
🧂 Ingredients
- 6 large day-old croissants (about 10 oz / 285g total)
- 1 1/2 quarts (1.4L) softened vanilla ice cream
- 1/2 cup (120ml) heavy cream, warmed
- 8 oz (225g) semisweet chocolate, chopped
- 3 tbsp (42g) unsalted butter
- 1/4 cup (60g) creamy peanut butter
- 1/3 cup (60g) mini chocolate chips
- 1/2 cup (50g) crushed salted pretzels
- 1 tsp (5ml) vanilla extract
- Flaky sea salt, for finishing
📋 Instructions
- 1Toast The Croissants — Tear or roughly chop the croissants into 1-inch pieces and scatter them on a sheet pan. Toast in a 350F (175C) oven for 6 to 8 minutes, until the edges are golden brown and they smell nutty, then cool completely. This step keeps them from going soggy under the ice cream.
- 2Line Your Pan — Line a 9×5-inch loaf pan with parchment paper, leaving a 2-inch overhang on the long sides. The overhang is your handle later, so do not skip it.
- 3Build The Base — Press half the toasted croissant pieces into an even, compact layer in the bottom of the pan. Use the bottom of a measuring cup to press firmly – you want it solid, not loose.
- 4Add The First Ice Cream Layer — Spoon half the softened ice cream over the croissants and spread it smooth with an offset spatula. Freeze for 20 minutes so this layer firms up before the next one goes on.
- 5Swirl And Stack — Dollop the peanut butter over the chilled ice cream, then scatter the remaining croissant pieces on top. Add the rest of the ice cream and spread it level, pressing gently so everything settles together.
- 6Freeze Until Firm — Cover the pan tightly with plastic wrap and freeze for at least 6 hours or overnight. The bar is ready when it is completely firm to the touch and a skewer inserted in the center comes out cold, around 0F (-18C) internal temperature.
- 7Make The Chocolate Shell — Warm the heavy cream in a small saucepan over medium-low heat until it just begins to steam, about 2 minutes – do not let it boil. Pour it over the chopped chocolate and butter, let it sit 1 minute, then stir until glossy and smooth. Stir in the vanilla.
- 8Coat And Finish — Lift the frozen bar out of the pan using the parchment, set it on a rack, and pour the chocolate shell over the top, letting it drip down the sides. Immediately sprinkle with mini chocolate chips, crushed pretzels, and flaky sea salt. Freeze 10 minutes to set the shell.
- 9Slice And Serve — Warm a knife under hot water, dry it, and slice the bar into 6 thick pieces. Serve immediately – it softens fast, so keep leftovers in the freezer.

Elena focuses on healthy cooking and meal prep for people with limited time and budget. She shares flexible recipes and shortcuts that don’t sacrifice flavor.


Leave a Comment