
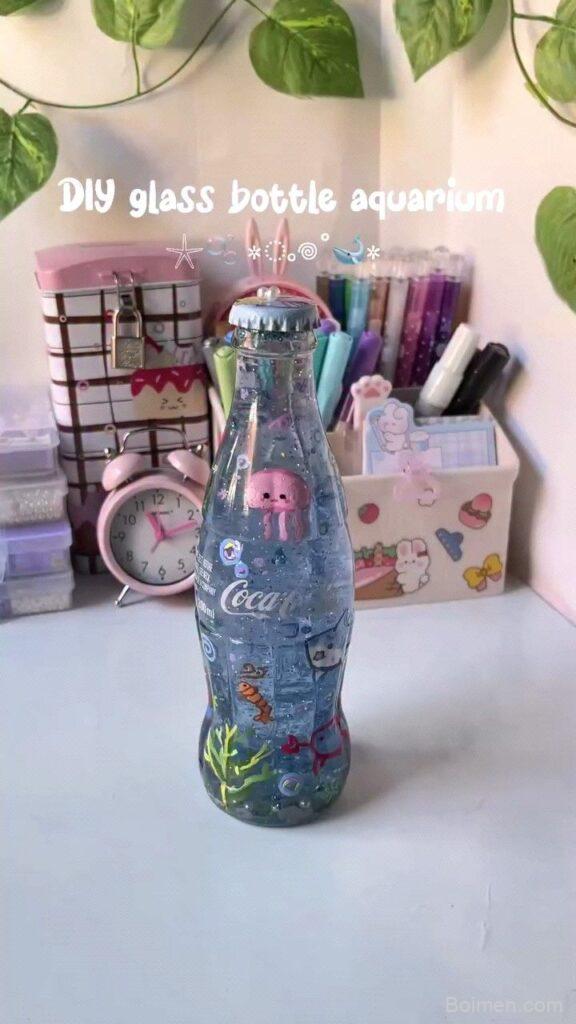
Picture a pickle jar on your windowsill that's quietly running its own little ocean — snails grazing, a shrimp patrolling, moss swaying like a tiny forest. A DIY glass bottle aquarium is the cheapest, most charming way to get that magic, and these seven hacks make it genuinely doable in an afternoon.
Advertisements1
- A 1-gallon wide-mouth glass jar is the ideal starter bottle — shape matters more than size.
- Cycle the water for 3–4 weeks before adding shrimp; seed material from an established tank cuts it to about a week.
- Stock with snails and cherry shrimp, never fish — a Betta needs 3–5 gallons minimum.
- Java moss, Anubias, and floaters thrive in low light and keep the water clean.
- Leave a 1-inch air gap and a loose lid; a sealed jar suffocates your livestock.
- Rinse sand and gravel until clear — 5–6 passes — to avoid a two-day cloud.
Pick the Right Bottle (and Why Shape Beats Size)
A 1-gallon (about 4-liter) clear glass jar with a wide mouth is your sweet spot for a first bottle aquarium. Wide-mouth jars — think a 2-quart Mason jar or a large pickle jar — let your hand and a turkey baster reach the bottom, which matters more than raw volume. Tall, narrow-neck bottles look gorgeous but trap your tools and make planting a two-person wrestling match.
Glass beats plastic every time because it doesn't scratch into a cloudy haze after a few months of algae scrubbing. Check for chips around the rim and hold the bottle up to a window: if the glass has a green or blue tint, colors inside will read differently. Clear is safest for beginners.
One playful prompt: imagine your bottle is a snow globe that never shakes — what do you want to see floating in it? Sketch it on a sticky note before you buy anything. Messy first drafts apply to aquariums too.
Build a Layered Substrate Like a Tiny Cake
Layer your substrate in three acts: a 1-inch base of organic potting soil (no fertilizer pellets), a thin dusting of crushed coral or a pinch of baking soda for buffering, then a 1-inch cap of fine sand or gravel. This is the Walstad-inspired method, and the soil feeds plant roots for months so you barely need to dose anything.
The cap is non-negotiable — without it, soil clouds the water every time a snail sneezes. Rinse your sand in a bucket until the runoff runs clear (usually 5–6 rinses) before adding it. Slope the substrate so one side is deeper; it creates visual depth in a tiny space and gives rooted plants a hill to grab.
Common mistake: using aquarium gravel straight from the bag. Even "pre-rinsed" gravel dumps a chalky cloud that takes two days to settle. Rinse it anyway.
Choose Plants That Thrive in Low Light
For a bottle with no filter and modest light, go with the unholy trinity of beginner plants: Java moss, Anubias nana, and a small clump of floating Salvinia or duckweed. Java moss ties to a pebble with cotton thread and spreads like a green shag carpet; Anubias tolerates shade and grows one leaf every few weeks; floaters suck up excess nutrients and shade the water to keep algae down.
Skip anything labeled "carpet" or "red." Those need high light and CO2, and in a bottle they melt into brown mush within three weeks. Aim for 6–8 hours of indirect light — a north-facing windowsill or a $12 clip-on LED on a timer works beautifully.
Think of plants as the bottle's lungs and liver at once: they exhale oxygen and filter waste. A jam-packed bottle of plants is far more stable than a sparse one with a lonely fish.
Stock It With Snails and Shrimp, Not Fish
Here's the truth that saves a hundred heartbreaks: a 1-gallon bottle is a snail-and-shrimp home, not a fish tank. A single Betta needs 3–5 gallons minimum. Instead, add 2–3 ramshorn or bladder snails (often free from a fish store's plant tank) and, once the bottle has cycled for 3–4 weeks, 2–3 cherry shrimp. They're tiny, colorful, and genuinely entertaining.
Cherry shrimp are the crabs-and-octopuses of the jar world — they pick across the substrate like little red crabs on a beach. Watch them for a week before adding more; overstocking is the number-one killer of bottle aquariums.
Mistake to dodge: dumping shrimp in on day one. Without a cycled tank, ammonia spikes and they die overnight. Wait, test, then stock.
Cycle the Water Before Anything Living Moves In
"Cycling" sounds intimidating but it's just letting beneficial bacteria colonize your substrate and plants so they can eat fish waste. Fill the bottle with dechlorinated water (use a water conditioner — a quarter-teaspoon treats a gallon), plant it, and run a light 6–8 hours daily for 3–4 weeks. Add a pinch of fish food every few days to feed the bacteria.
If you can get a handful of gravel or a sponge squeeze from an established aquarium, you'll shortcut the cycle to about a week. That's the single best hack in this whole list — ask a local fish club or a friendly pet store; most hobbyists will happily hand over "seed" material.
Mistake: trusting a test strip's vague color. Use a liquid ammonia test kit (API is the standard) and wait until ammonia and nitrite both read zero.
Skip the Filter With the "Lid-and-Breathe" Method
A bottle aquarium can run filter-free if you keep it planted, lightly stocked, and topped off. The trick is a loose lid — glass or mesh — that slows evaporation while letting gas exchange happen. Leave a 1-inch air gap so oxygen can dissolve and CO2 can escape. Do a 20–30% water change weekly with a turkey baster; it's oddly satisfying, like vacuuming a dollhouse.
If you want gentle circulation, a tiny USB air pump with a rigid tube set to a slow bubble works, but many bottle keepers skip it entirely. The plants and the air gap do the heavy lifting.
Mistake: sealing the lid tight for a "self-sustaining terrarium" look. That traps gases and cooks your shrimp. Breathable, always.
Style It Like a Storybook Scene
This is where the fun lives. Add one focal point — a single smooth river stone, a twist of driftwood, or a tiny ceramic castle — and arrange plants around it in odd numbers. Odd-numbered groupings read as natural; even numbers look like a shelf display. Angle your tallest plant toward the back corner and let moss creep forward.
A black background (even a sheet of black card taped behind the jar) makes colors pop like a theater stage. Keep the front glass clean with a magnetic scraper or a dedicated sponge — no soap, ever.
Playful prompt: what tiny creature would live here if this were a fairy tale? Build the scene around that answer. Your bottle doesn't have to look like anyone else's.
The Hacks, Step by Step
- 1Rinse everything before it touches water
Rinse sand, gravel, and decor until runoff is clear — 5–6 passes — so you don't start with a cloudy bottle. - 2Layer soil, buffer, and sand cap
1 inch organic soil, a pinch of crushed coral, 1 inch rinsed sand, sloped for depth. - 3Plant Java moss, Anubias, and floaters
Tie moss to a pebble with cotton thread; tuck Anubias roots into the substrate; float a small clump of Salvinia. - 4Fill with dechlorinated water
Pour over a plastic bag or spoon to avoid disturbing the substrate; leave a 1-inch air gap. - 5Cycle for 3–4 weeks with a pinch of food
Feed bacteria every few days; test ammonia and nitrite with a liquid kit until both hit zero. - 6Add 2–3 snails, then shrimp after a week
Stock slowly; watch for ammonia spikes before adding more livestock. - 7Do a weekly 20–30% water change
Use a turkey baster to siphon debris and replace with dechlorinated water. - 8Keep the lid loose and light indirect
6–8 hours of indirect light or a timed LED; never seal the jar airtight.
The best bottle aquariums aren't the biggest or the fanciest — they're the ones where the plants, snails, and shrimp find their own quiet balance.
Frequently Asked Questions
Can I keep a fish in a glass bottle aquarium?
No — a 1-gallon bottle is too small for any fish, including Betta, which needs 3–5 gallons minimum. Stick to snails and cherry shrimp, which thrive in small planted setups.
How long does a DIY bottle aquarium take to set up?
Plan on 3–4 weeks total: one afternoon to build and plant, then 3–4 weeks of cycling before livestock. Seeded filter material from an established tank can shorten cycling to about a week.
Do I need a filter or air pump for a bottle aquarium?
Not necessarily — a heavily planted bottle with a loose lid and weekly water changes can run filter-free. A small USB air pump is optional if you want gentle circulation.
What plants work best in a small glass bottle?
Java moss, Anubias nana, and floating plants like Salvinia or duckweed are the most reliable low-light choices. Avoid carpeting or red plants, which need high light and CO2.
How often should I change the water?
Do a 20–30% water change weekly using dechlorinated water and a turkey baster to siphon debris. Top off evaporation with dechlorinated water between changes.



Leave a Comment