
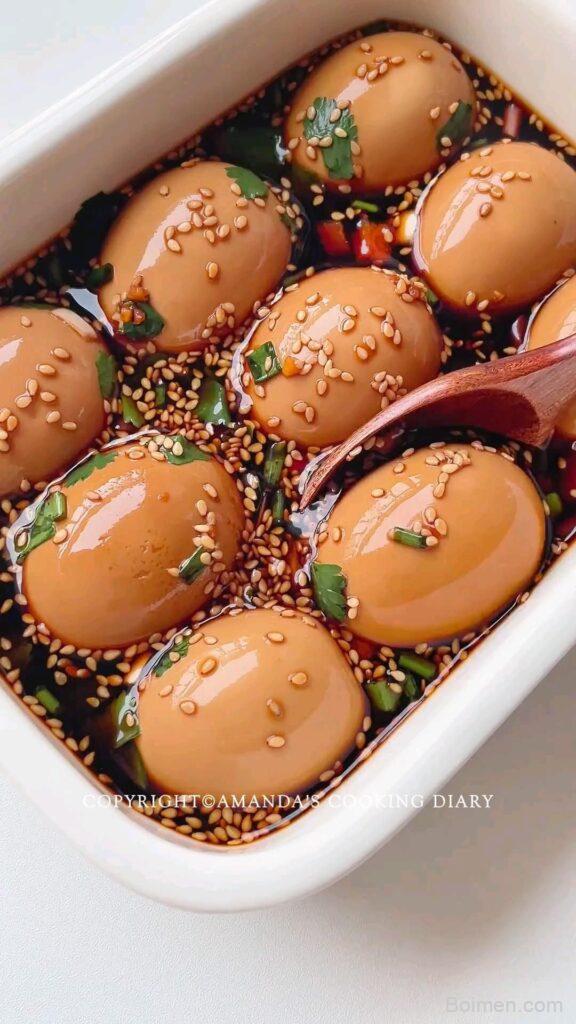
Let's be honest: we've all been there. You're scrolling through Pinterest at 11 p.m., stomach growling, and you stop dead on a photo so gorgeous you can practically smell it through the screen. That's the power of a Pinterest image. It's not just a picture; it's a promise. A promise that says, 'You can make this, and it will be delicious.'
Advertisements1
But here's the thing nobody tells you: creating that kind of image isn't about owning a fancy camera or spending hours in Photoshop. It's about understanding a few simple principles. Think of it like making a perfect omelet. The ingredients are basic, but the technique? That's what separates a sad, rubbery scramble from a fluffy, golden masterpiece.
In this guide, I'm going to walk you through creating a Pinterest image that doesn't just get saved but gets clicked. We'll talk about lighting, composition, and the little tricks that make food look irresistible. Ready to make your recipes the star of the show?
Why You'll Love This Recipe
About the Ingredients
1 fresh, high-quality dish (your finished recipe)
The star of your image. Use the actual dish you're promoting. For best results, make it look its best: garnish with fresh herbs, a drizzle of sauce, or a sprinkle of flaky salt.
1 smartphone or DSLR camera
Your phone's camera is more than capable. If using a DSLR, a 50mm lens is a great, affordable choice for food photography.
1 large window with indirect natural light
This is your best friend. Avoid direct sunlight, which creates harsh shadows. North-facing windows are ideal. If you don't have one, a white foam board can help bounce light.
2-3 simple props (linens, utensils, a plate)
Keep it minimal. A textured linen napkin, a vintage fork, or a colorful plate can add interest without distracting from the food.
1 editing app (e.g., Lightroom Mobile, Snapseed)
These apps let you adjust exposure, contrast, and color to make your image pop. Lightroom Mobile is a favorite for food bloggers.
1 text overlay tool (e.g., Canva, Photoshop)
Canva is free and incredibly easy to use for adding text overlays that tell viewers what the recipe is.
Tips & Tricks
Avoid Harsh Shadows
The biggest mistake is shooting in direct sunlight. It creates unappetizing, dark shadows. Instead, shoot near a window with soft, indirect light, or use a diffuser like a sheer curtain.
Don't Overcrowd the Frame
A cluttered image is confusing. Keep your composition simple. Let the food be the hero. Remove distracting background items and use a shallow depth of field (blurred background) to make the dish stand out.
Skip the Text Overload
While text overlays are important, too much text can look messy and unprofessional. Keep it short, use a readable font, and make sure it contrasts well with the background. Your title should be the star.
Pro Tips
Step-by-Step Instructions
1. Set the Scene
Choose a clean, uncluttered surface near a window with soft, indirect light. Place your dish on a simple plate or board. Remember, the goal is to make the food the focal point, not the background.
2. Style the Dish
Add a garnish, a drizzle, or a sprinkle of something to give the dish life. A sprig of parsley, a dusting of powdered sugar, or a few drips of sauce can make it look freshly made and irresistible.
3. Find Your Angle
Shoot from a 45-degree angle for a classic, appetizing look, or directly overhead (flat lay) for a more graphic, modern feel. Take multiple shots from different angles to see what works best.
4. Light It Right
Position your dish so the light comes from the side or behind (backlighting) to create depth and texture. Avoid using your camera's flash, which flattens the image and creates harsh glare.
5. Edit for Impact
Open your photo in an editing app. Increase exposure slightly, boost contrast, and add a touch of warmth. Don't over-edit; you want it to look natural and delicious, not fake.
6. Add Text Overlay
Use Canva or a similar tool to add a short, compelling title. Choose a bold, readable font and a color that contrasts with the background. Keep it concise: 'Creamy Garlic Pasta' or '30-Minute Cheesy Tacos'.
7. Optimize for Pinterest
Save your image as a vertical 2:3 ratio (e.g., 1000×1500 pixels). Write a keyword-rich description for your pin and include a link to your recipe. This helps Pinterest's algorithm understand and share your content.
Delicious Variations
Moody & Dark
Use a dark background and side lighting for a dramatic, rustic feel. Perfect for hearty stews or chocolate desserts.
Bright & Airy
Use a white background and soft, diffused light for a fresh, clean look. Ideal for salads, smoothies, and light pastas.
Action Shot
Capture a drizzle, a sprinkle, or a cheese pull to add movement and excitement to your image.
How to Store Pinterest Image
Refrigerator
Store your finished dish in an airtight container in the refrigerator for up to 3 days. Reheat gently before serving.
Freezer
Most cooked dishes can be frozen for up to 3 months. Wrap tightly and label with the date. Thaw overnight in the refrigerator before reheating.
Reheating
Reheat in the microwave or on the stovetop until steaming hot. For best texture, reheat in the oven at 350°F (175°C) for 10-15 minutes.
Frequently Asked Questions
Q: What is the best aspect ratio for a Pinterest image?
The best aspect ratio for a Pinterest image is 2:3, which translates to 1000×1500 pixels. This vertical format takes up more screen space in the feed and is more likely to catch a user's eye. Using this ratio ensures your image displays fully without being cropped.
Q: Do I need a professional camera to take good Pinterest photos?
No, you don't need a professional camera; a modern smartphone is perfectly capable of taking stunning Pinterest images. The key is to use natural light, keep your composition simple, and edit your photos with a good app. Many top bloggers shoot entirely with their phones.
Q: How can I make my food look appetizing in photos?
To make food look appetizing, focus on lighting, styling, and freshness. Use soft, indirect natural light, add garnishes like fresh herbs or a drizzle of sauce, and shoot from an angle that highlights the texture. Avoid harsh shadows and overly busy backgrounds.
Q: What should I write in my Pinterest pin description?
Your Pinterest pin description should include relevant keywords, a brief description of the recipe, and a call to action. For example, 'Easy 30-Minute Creamy Garlic Pasta – the perfect weeknight dinner! Get the recipe now.' This helps with SEO and encourages clicks.
Q: How often should I pin to Pinterest?
For best results, pin consistently, ideally 5-15 times per day, but quality matters more than quantity. Use a scheduling tool like Tailwind to space out your pins and ensure you're sharing a mix of your own content and others'. Consistency helps you stay visible in the algorithm.
Now that you've got the blueprint, it's time to put it into action. Grab your phone, find that beautiful window light, and start creating Pinterest images that make people hungry. Your recipes deserve to be seen, and with these tips, they will be. Stay curious, stay safe.

Pinterest Image
Pinterest Image is a stunning, shareable visual recipe guide that turns your favorite dishes into scroll-stopping pins. Save time and wow your followers.
🧂 Ingredients
- 1 fresh, high-quality dish (your finished recipe)
- 1 smartphone or DSLR camera
- 1 large window with indirect natural light
- 2-3 simple props (linens, utensils, a plate)
- 1 editing app (e.g., Lightroom Mobile, Snapseed)
- 1 text overlay tool (e.g., Canva, Photoshop)
📋 Instructions
- 1Set the Scene — Choose a clean, uncluttered surface near a window with soft, indirect light. Place your dish on a simple plate or board. Remember, the goal is to make the food the focal point, not the background.
- 2Style the Dish — Add a garnish, a drizzle, or a sprinkle of something to give the dish life. A sprig of parsley, a dusting of powdered sugar, or a few drips of sauce can make it look freshly made and irresistible.
- 3Find Your Angle — Shoot from a 45-degree angle for a classic, appetizing look, or directly overhead (flat lay) for a more graphic, modern feel. Take multiple shots from different angles to see what works best.
- 4Light It Right — Position your dish so the light comes from the side or behind (backlighting) to create depth and texture. Avoid using your camera's flash, which flattens the image and creates harsh glare.
- 5Edit for Impact — Open your photo in an editing app. Increase exposure slightly, boost contrast, and add a touch of warmth. Don't over-edit; you want it to look natural and delicious, not fake.
- 6Add Text Overlay — Use Canva or a similar tool to add a short, compelling title. Choose a bold, readable font and a color that contrasts with the background. Keep it concise: 'Creamy Garlic Pasta' or '30-Minute Cheesy Tacos'.
- 7Optimize for Pinterest — Save your image as a vertical 2:3 ratio (e.g., 1000×1500 pixels). Write a keyword-rich description for your pin and include a link to your recipe. This helps Pinterest's algorithm understand and share your content.

Kwame writes about technology and digital privacy for everyday users. He breaks down complex topics like data tracking and encryption into simple, relatable terms.


Leave a Comment