
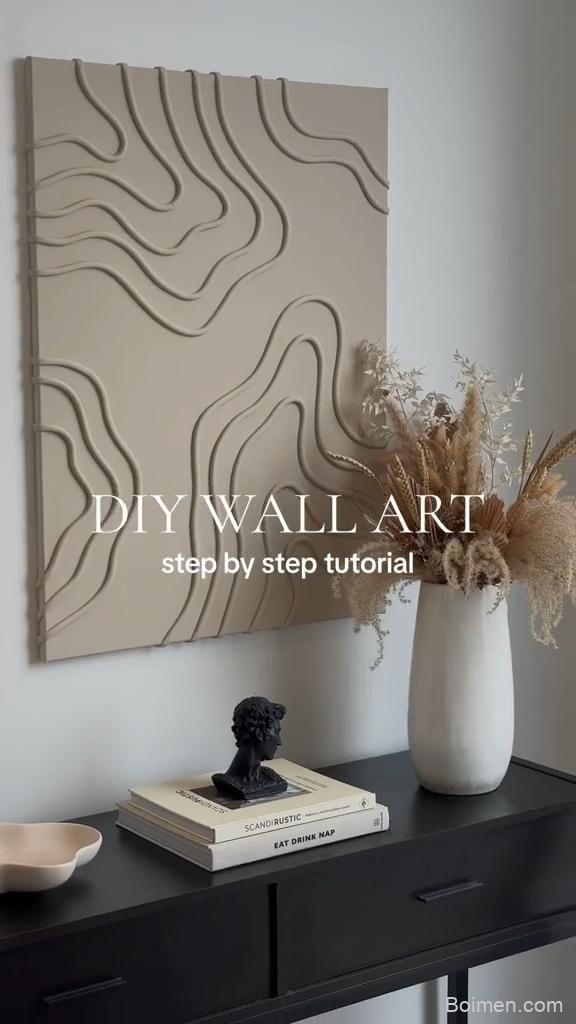
I turned a blank wall into a gallery-worthy focal point using a $12 canvas and leftover paint. In this tutorial, I'll show you exactly how to create your own easy, aesthetic wall art in under an hour—no art degree required.
Advertisements1
- You can create custom wall art for under $25 with basic acrylics and a canvas.
- Abstract designs are the most forgiving for beginners—embrace imperfection.
- Always use a drop cloth and let layers dry to avoid muddy colors and cracks.
- Painter's tape is your secret to crisp, professional-looking edges.
- Hang art at eye level (57 inches) and mix sizes for a gallery feel.
Why DIY Wall Art Beats Store-Bought (and Saves You Hundreds)
Last year, I fell in love with a $220 abstract canvas at a local boutique. Instead of buying it, I spent $18 on supplies and made my own version. It's now the first thing guests compliment. Store-bought art is often mass-produced and overpriced; DIY lets you customize colors to match your space perfectly.
Plus, creating something with your hands is incredibly satisfying. You don't need to be an artist—simple techniques like color blocking or geometric shapes can look high-end. The key is choosing a design that feels authentic to your style, not copying a trend you'll tire of in six months.
My biggest tip: start with a small canvas (8×10 or 11×14) to test your idea. If you love it, scale up. If not, you've only invested a few dollars and an afternoon.
Gather These 5 Supplies (Total Cost: Under $25)
You don't need a studio's worth of materials. Here's exactly what I use for a 16×20 canvas: a pre-stretched canvas (Michaels or Amazon, ~$8), acrylic paint in 3-4 colors (I love Liquitex Basics, ~$5 each), a set of foam brushes and one flat brush (~$3), painter's tape (~$4), and a plastic drop cloth or old cardboard (~free).
Acrylic paint is forgiving—it dries fast and layers well. Foam brushes are great for smooth, even coats, while a flat brush gives you more control for details. Painter's tape is your secret weapon for crisp lines if you're doing geometric designs.
Don't skip the drop cloth. I learned the hard way when a glob of navy paint landed on my rug. Now I always protect my workspace, even for a 'quick' project.
Step-by-Step: Create a Modern Abstract in 30 Minutes
First, tape off your canvas if you want clean edges—I like a 1-inch border. Then, squeeze three blobs of paint (e.g., white, beige, and terracotta) directly onto the canvas. Use a foam brush to spread them in long, sweeping strokes, blending slightly but leaving some texture.
Next, add contrast with a few bold strokes of a darker color (like charcoal or navy). Don't overthink it—abstract art is about emotion, not perfection. I usually step back every few minutes to check the balance. If it feels too busy, add more white; if too plain, add a pop of color.
Let it dry completely (acrylics dry to the touch in 20-30 minutes). Peel off the tape slowly at a 45-degree angle for crisp lines. Voila—you have a custom piece that looks like it cost $200.
3 Foolproof Design Ideas for Any Skill Level
Idea 1: Color Block Minimalism. Use painter's tape to create two or three large rectangles. Paint each a different shade of the same color family (e.g., light gray, medium gray, charcoal). Peel tape for a crisp, modern look. I made one for my bedroom in under 20 minutes.
Idea 2: Abstract Landscape. Paint a horizontal band of sky (light blue), a band of mountains (purple-gray), and a band of ground (olive green). Blend the edges with a dry brush for a soft, watercolor effect. This works beautifully in a 12×16 size.
Idea 3: Metallic Accent. Paint the entire canvas a solid color (like deep green). Once dry, use a small brush to add thin gold leaf lines or dots. It's elegant and forgiving—imperfections look intentional.
Common Mistakes That Ruin DIY Art (and How to Avoid Them)
Mistake 1: Using too much paint. It'll crack as it dries. Instead, build up thin layers. Mistake 2: Not letting layers dry. You'll end up with muddy colors. Wait 15-20 minutes between coats. Mistake 3: Skipping a primer. On raw canvas, paint soaks in and looks dull. A coat of gesso (or even white acrylic) makes colors pop.
I once tried to rush a project and ended up with a gray-brown mess. Now I set a timer and walk away between steps. It's worth the patience.
Also, don't hang your art immediately. Let it cure for 24 hours to avoid smudges. And always use a level when hanging—a crooked canvas drives me crazy.
How to Hang and Style Your New Piece Like a Pro
For a gallery wall, arrange your pieces on the floor first. I use the 'rule of thirds': place the center of the art at 57 inches from the floor (average eye level). If you're renting, use damage-free hanging strips—they hold up to 16 pounds.
Mix sizes and orientations for visual interest. Pair a large abstract with two smaller minimalist prints. Keep the spacing between frames consistent (2-3 inches).
Lighting matters: a picture light or a nearby lamp can make colors glow. I added a $20 LED picture light from Amazon, and it transformed my hallway art.
The Hacks, Step by Step
- 1Choose a color palette
Pick 3-4 colors that match your room. Use a color wheel or pull from a favorite fabric. This ensures cohesion. - 2Prep your workspace
Cover your table with a drop cloth. Tape off canvas edges if you want a border. This prevents mess and gives a clean finish. - 3Apply base layer
Squeeze paint directly on canvas and spread with a foam brush in sweeping motions. Work quickly to blend while wet. - 4Add contrast
Use a darker or metallic color for accents. Make bold, intentional strokes. Step back to assess balance. - 5Let it dry and peel tape
Wait 30 minutes. Slowly remove tape at a 45-degree angle. This reveals crisp lines. - 6Hang and enjoy
Use a level and measure 57 inches to center. Style with other art or alone as a statement piece.
The best DIY art isn't about perfection—it's about making something that tells your story and fits your space.
Frequently Asked Questions
What kind of paint should I use for DIY wall art?
Acrylic paint is best for beginners because it's affordable, dries quickly, and can be layered. Look for heavy-body acrylics like Liquitex or Golden for texture.
How do I prevent my canvas from warping?
Use a pre-stretched canvas and avoid soaking it with too much water or paint. Apply thin layers and let each dry completely.
Can I make DIY wall art without any artistic skills?
Absolutely. Geometric designs, color blocking, and abstract strokes require no drawing ability. Just follow a simple pattern or use tape.
How long does it take for acrylic paint to dry?
Acrylics are touch-dry in 20-30 minutes, but wait 24 hours before varnishing or hanging in a humid area. Thin layers dry faster.
What if I mess up my painting?
You can always paint over it once dry. Acrylics are opaque, so a fresh layer hides mistakes. Or embrace the imperfection—it adds character.



Leave a Comment