
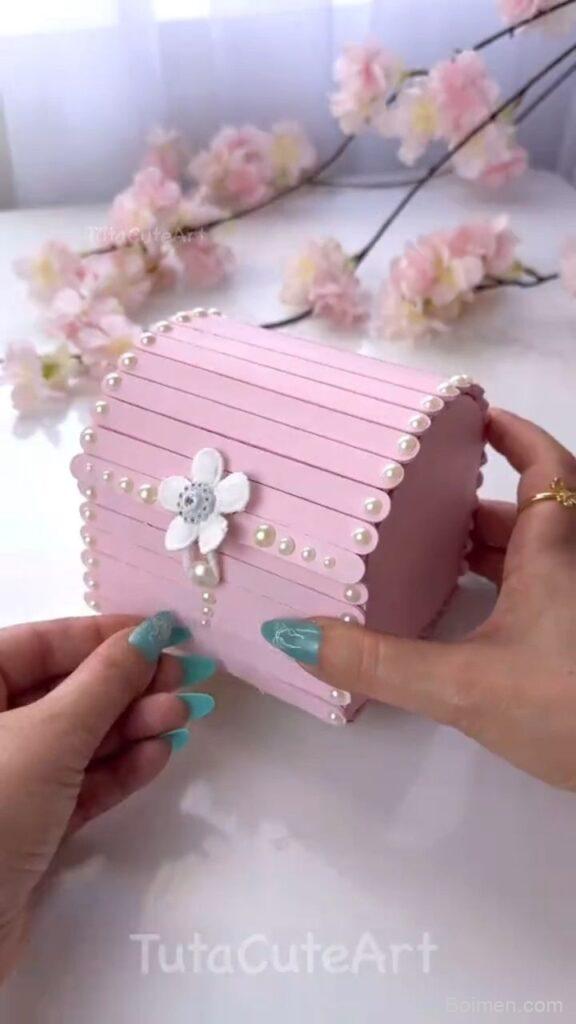
Ever spotted a vintage jewelry box at a flea market and thought, 'I could make that'? You can—and it'll be even more special because you made it. Here are seven playful hacks to turn a plain wooden box into an elegant treasure chest that looks boutique-worthy.
Advertisements1
- Prepping with sanding and priming is non-negotiable for a flawless finish.
- Dry-brushing metallic paint on edges creates an expensive, aged look.
- Lining the interior with velvet or fabric adds a luxurious feel.
- Upgrading hardware (hinges, clasp) elevates the box from craft to heirloom.
- Sealing with polycrylic or wax protects your work and ensures durability.
- Adding dividers and secret compartments makes the box functional and fun.
Hack 1: Prep Like a Pro: Sand, Seal, and Smooth
Before you paint or embellish, give your box a spa day. Start with 220-grit sandpaper to smooth rough spots, then wipe with a damp cloth. Apply a coat of primer—I use Zinsser Bullseye 1-2-3—to block stains and give paint something to grip. This step is like priming a canvas; skip it and your paint may peel or look blotchy. Let primer dry for 30 minutes.
Why it works: Primer creates a uniform surface so your topcoat glides on evenly and lasts. It also prevents wood tannins from bleeding through light-colored paints.
Common mistake: Over-sanding edges and rounding them too much. Aim for a gentle smoothing, not reshaping. Also, don't forget the inside—if you plan to line it, sanding helps adhesive stick.
Hack 2: Paint with Purpose: Layers and Techniques
For a chic, aged look, try a two-tone paint job. Base coat in a soft ivory (like Annie Sloan Chalk Paint in 'Old White'), then dry-brush a metallic gold (such as Rub 'n Buff in 'Antique Gold') along edges and raised details. Dry-brushing means dipping your brush lightly, wiping most off, then skimming the surface—it catches only the high points, mimicking years of wear.
Why it works: The contrast between matte base and metallic highlights adds depth and catches light, making the box look expensive.
Common mistake: Using too much paint on the dry brush. If your brush feels wet, wipe more off. You want a whisper of color, not a smear. Practice on a scrap piece first.
Hack 3: Line with Luxury: Fabric, Paper, or Leather
The inside of your box is the hidden gem. Cut a piece of velvet, silk, or even patterned scrapbook paper to fit the bottom and sides. Use a flexible adhesive like Aleene's Tacky Glue—apply a thin, even layer with a foam brush, then press the fabric in place, smoothing out bubbles with a credit card. For a plush look, add a thin layer of batting under the fabric.
Why it works: A lined interior protects contents from scratches and adds a sensory 'wow' when opened. It's the difference between a craft and a keepsake.
Common mistake: Using too much glue, which soaks through fabric and creates stiff, discolored patches. Less is more; a little goes a long way.
Hack 4: Add Hardware That Shines: Hinges, Clasps, and Corners
Swap out flimsy hinges for solid brass ones (look for 1-inch brass hinges online or at craft stores). Add a decorative clasp and metal corner protectors. Pre-drill holes to avoid splitting the wood, then attach with a screwdriver. If you want an antique look, rub the hardware with a bit of dark wax.
Why it works: Quality hardware elevates the piece from homemade to heirloom. It also improves function—a sturdy clasp keeps the box securely closed.
Common mistake: Forcing screws without pre-drilling, which can crack thin wood. Also, don't overtighten; snug is enough.
Hack 5: Embellish with Intention: Decoupage, Stencils, or Wood Burning
Personalize the lid with a monogram stencil, decoupage a vintage map, or wood-burn a delicate pattern. For decoupage, use Mod Podge Matte: brush a thin layer on the box, press your paper down, smooth, then seal with two more coats. For stenciling, use a stencil brush and acrylic paint—stipple, don't swipe, to prevent bleed.
Why it works: These techniques add a custom, artisanal touch that reflects your style. They also distract from imperfections in the wood or paint.
Common mistake: Rushing decoupage and causing wrinkles or bubbles. Work slowly, and if a bubble appears, smooth it out immediately with your finger or a brayer.
Hack 6: Seal and Protect: The Finishing Touch
After all your hard work, protect it with a clear sealer. For painted surfaces, use a water-based polycrylic in satin or matte (like Minwax Polycrylic). Apply two thin coats with a high-quality synthetic brush, sanding lightly with 400-grit between coats. For a softer sheen, try wax—Annie Sloan Clear Wax—buffing after 24 hours.
Why it works: Sealer prevents chipping, fading, and moisture damage, ensuring your box stays elegant for years.
Common mistake: Applying thick coats that drip or yellow over time. Thin layers dry faster and look more professional.
Hack 7: Style the Inside: Compartments and Surprises
Turn your box into a functional treasure by adding dividers. Cut thin foam board or balsa wood to create sections for rings, necklaces, or tiny treasures. Cover dividers with velvet for a cohesive look. You can also add a secret compartment by building a false bottom—just a shallow tray that lifts out.
Why it works: Organization makes the box practical, and hidden compartments add a sense of wonder.
Common mistake: Making dividers too tall so the lid won't close. Measure the interior height and subtract a quarter inch for clearance.
The Hacks, Step by Step
- 1Sand and prime the box
Use 220-grit sandpaper to smooth all surfaces, wipe clean, then apply a coat of primer. Let dry 30 minutes. This ensures paint adheres and looks even. - 2Paint base coat
Apply two thin coats of chalk paint or acrylic in your chosen color, letting each dry completely. Sand lightly with 400-grit between coats for a smooth finish. - 3Add metallic accents
Dry-brush metallic paint or Rub 'n Buff on edges and details. Use a light touch—less is more—to create an aged, elegant look. - 4Line the interior
Cut fabric or paper to fit bottom and sides. Apply a thin layer of tacky glue with a foam brush, press fabric in place, and smooth out bubbles. - 5Attach hardware
Pre-drill holes for hinges, clasp, and corner protectors. Screw them in snugly, but don't overtighten. Rub with dark wax for an antique finish if desired. - 6Embellish the lid
Use stencils, decoupage, or wood burning to add a personal touch. Work slowly to avoid mistakes, and seal with Mod Podge if decoupaging. - 7Seal the exterior
Apply two thin coats of polycrylic or wax, following the product instructions. Sand lightly between coats for a professional finish. - 8Create interior compartments
Cut foam board or balsa wood to size, cover with velvet, and arrange inside. Ensure dividers are shorter than the interior height so the lid closes.
The secret to an elegant treasure box isn't expensive materials—it's the patience to prep, layer, and seal like a pro.
Frequently Asked Questions
What kind of paint is best for a DIY treasure box?
Chalk paint or acrylic paint works best because they adhere well to wood and come in many colors. Chalk paint is especially forgiving and can be distressed easily.
How do I line the inside of a wooden box?
Use a flexible adhesive like tacky glue and a thin fabric like velvet or silk. Apply glue with a foam brush, press fabric in place, and smooth out bubbles with a credit card.
Can I use Mod Podge to seal a decoupaged box?
Yes, Mod Podge is ideal for sealing decoupage. Apply a thin layer over the paper, let dry, then add two more coats for durability.
What's the best way to attach hinges to a small wooden box?
Pre-drill pilot holes slightly smaller than your screws, then attach hinges with a screwdriver. This prevents splitting the wood. Use brass hinges for a quality look.
How can I make my treasure box look antique?
Dry-brush metallic paint on edges, use dark wax on hardware, and distress paint with sandpaper. These techniques mimic wear and age.



Leave a Comment