
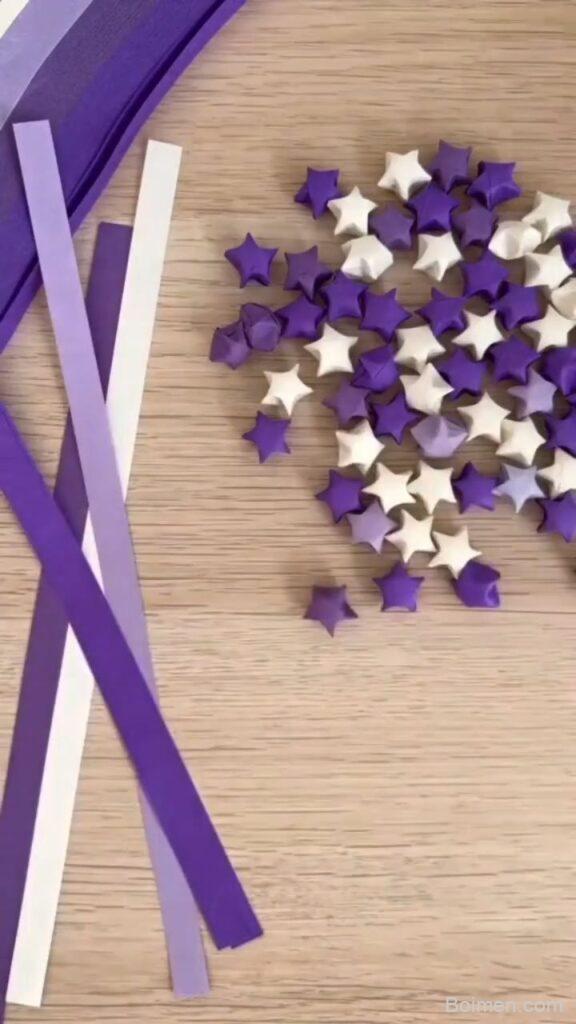
Ever seen those tiny, puffy origami stars and thought, 'I could never make those'? I'm here to tell you that you absolutely can—and it's easier than you think. I've been folding these little guys for years, and I've picked up 10 hacks that make the process faster, cuter, and way more fun. Grab some paper strips, and let's get folding.
Advertisements1
- Use thin paper strips (1 cm wide) for easy folding and puffing.
- Keep the initial knot loose to allow shaping later.
- Wrap snugly but not tightly to avoid a stiff star.
- Press the middle of each side to puff, not the corners.
- Embrace imperfection—each star gets easier with practice.
Why Mini Stars Are the Perfect First Origami Project
Mini stars, also known as lucky stars or puffy stars, are made from simple strips of paper. Unlike complex origami that requires precise folds and expensive paper, these stars need just a strip and your fingers. The repetitive motion is meditative, and you can finish one in under a minute once you get the hang of it. I started making them during my commute, and now I have a jar full on my desk that makes me smile every day.
The best part? You don't need perfect folds. The paper coils around itself, so small mistakes disappear. It's a forgiving project that builds confidence. If you can tie a knot, you can make a star. That's why I always recommend it to friends who say they're 'not crafty.'
Choose the Right Paper: Skip the Fancy Stuff at First
You might be tempted to buy expensive origami paper, but for mini stars, you want long, thin strips. Standard origami paper is too thick and short. Instead, cut your own strips from wrapping paper, magazine pages, or even old books. I use a paper trimmer to cut 1 cm wide strips from 15 cm x 15 cm origami paper—that gives me 15 strips per sheet. For a more delicate star, go down to 0.5 cm, but that's fiddly; start with 1 cm.
Printer paper works in a pinch, but it's stiff and can crack when you press the sides. Wrapping paper is my favorite because it's thin and comes in cute patterns. Avoid cardstock—it won't fold flat. If you're using a paper cutter, make sure your strips are uniform; uneven widths make lumpy stars.
The Knot: Your Foundation for a Perfect Star
The knot is the trickiest part for most people. Here's how I do it: hold one end of the strip between your thumb and index finger, then loop the other end around your fingers to form a loop. Tuck the short end under the long end and pull gently—like tying a shoelace, but looser. You want a pentagon shape, not a tight knot. If it's too tight, you won't be able to shape the star later.
Once you have the pentagon, flatten it gently with your fingers. Don't crease it hard yet. The goal is to have five sides of roughly equal length. If one side is longer, adjust by sliding the strip. This step takes practice, but after five or six tries, your fingers will remember. I still mess up the first one after a break, so don't stress.
Wrapping: The Secret to Even, Puffy Stars
After the knot, you'll wrap the long tail around the pentagon, following its shape. The key is to wrap snugly but not tightly—think of it as guiding the paper, not strangling it. Each wrap should lie flat against the previous one. I wrap counterclockwise, but clockwise works too; just be consistent. You'll go around about 5-7 times until the tail is too short to wrap.
Here's a hack: as you wrap, use your thumbnail to crease each fold lightly. This keeps the pentagon shape crisp. If the paper slips, hold the pentagon with your non-dominant hand. I like to wrap while watching TV—it's that mindless. Tuck the final tail into a pocket created by the wraps. If it won't stay, a tiny dab of glue stick works, but usually, friction holds it.
Shaping: How to Puff Without Tearing
Now for the magic moment: turning that flat pentagon into a puffy star. Pinch one of the five flat sides between your thumb and index finger, and gently press inward. The paper will pop into a three-dimensional point. Rotate and repeat for all five sides. The trick is to press in the middle of each side, not at the corners. If you press at the corners, you'll crush the star.
Go slowly. If the paper starts to tear, you're pressing too hard or your paper is too thick. I've torn many stars by rushing. Once all five sides are puffed, you can adjust the points to be more rounded or sharp. For extra cuteness, use a pencil tip to gently push out any dents. The star should look like a little pillow.
Troubleshooting: Fixing Lumpy or Lopsided Stars
If your star looks more like a blob, check your wrapping tension. Too loose, and it won't hold shape; too tight, and it's stiff and hard to puff. Another common issue is uneven sides—usually from an uneven knot. Unravel and start over; it's only paper. I keep a 'reject' pile and sometimes re-wrap them later. Also, if your star won't puff, the paper might be too thick. Try thinner strips.
For lopsided stars, shape them by pinching the points individually. You can also roll the star between your palms to even it out. Remember, handmade means imperfections are part of the charm. My first ten stars were terrible, but now I can make them in my sleep. Progress, not perfection.
Display and Gift Ideas: Show Off Your Tiny Treasures
Mini stars are adorable on their own, but you can do so much more. Fill a small glass jar—I use a mason jar—and tie a ribbon around the neck. It makes a sweet desk decoration. You can also string them into a garland using a needle and thread. I made a 100-star garland for my daughter's birthday, and it cost me nothing but time and leftover wrapping paper.
For gifts, put a handful in a tiny envelope with a note like 'You're a star.' Teachers love them as classroom rewards. You can also glue a pin back onto a star for a cute brooch. My favorite: use them as confetti for a party—they're reusable and eco-friendly. The possibilities are endless, and each star takes less than a minute to make once you're in the zone.
The Hacks, Step by Step
- 1Cut uniform paper strips
Use a paper trimmer to cut 1 cm wide strips from thin paper like wrapping paper. Uniform width ensures even stars. Avoid thick paper like cardstock. - 2Tie a loose knot
Loop one end over the other to form a pentagon, tuck the short end under, and pull gently. Keep it loose so you can shape later. Flatten gently. - 3Wrap the tail snugly
Wrap the long tail around the pentagon, following its shape. Wrap 5-7 times, creasing lightly with your thumbnail. Tuck the end in. - 4Puff the star
Pinch each of the five flat sides in the middle and press inward to pop out the points. Press gently to avoid tearing. - 5Adjust and shape
Pinch the points to make them sharper or rounder. Roll the star between your palms to even it out. Fix any dents with a pencil tip.
The secret to perfect mini stars isn't precision—it's patience and a light touch.
Frequently Asked Questions
What kind of paper is best for origami mini stars?
Thin, long strips of paper work best. Wrapping paper or origami paper cut into 1 cm wide strips is ideal. Avoid thick paper like cardstock.
How do I make the star puffy without tearing it?
Press gently in the middle of each flat side. If it tears, your paper is too thick or you're pressing too hard. Use thinner paper and a lighter touch.
Can I make mini stars with regular printer paper?
Yes, but it's stiffer and harder to puff. If using printer paper, cut thinner strips (0.5 cm) and be extra gentle when shaping.
How long does it take to make one star?
With practice, about 30-60 seconds per star. Beginners might take 2-3 minutes until they get the hang of the knot and wrapping.
What can I do with finished mini stars?
Fill jars, make garlands, use as gift decorations, or turn them into jewelry. They're versatile and cute for many crafts.



Leave a Comment