
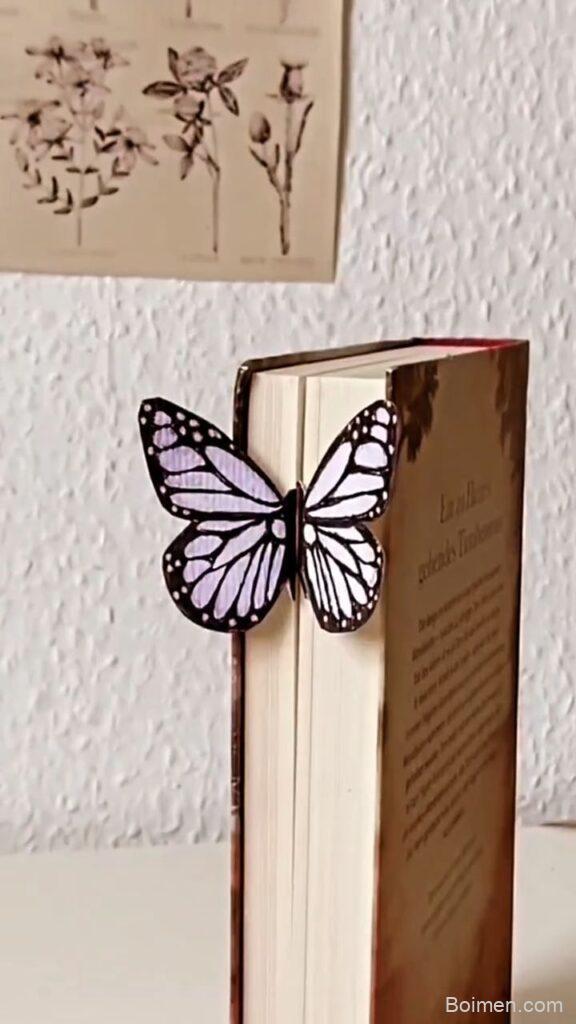
Ever wished your bookmark could flutter like a real butterfly? With a few craft supplies and 20 minutes, you can create a stunning DIY butterfly bookmark that turns every page into a magical journey. Let's dive in and make reading even more enchanting!
Advertisements1
- DIY butterfly bookmarks are easy to make with basic craft supplies and take about 20 minutes.
- Laminating or using contact paper makes your bookmark durable and long-lasting.
- Personalize with colors, glitter, or pressed flowers to match your reading mood.
- These bookmarks make heartfelt gifts for book lovers and are perfect for book club exchanges.
- Don't stress about perfection—messy first drafts often lead to the most charming results.
Why a DIY Butterfly Bookmark Will Transform Your Reading
There's something truly magical about opening a book and finding a delicate butterfly resting on the page. Unlike a plain slip of paper, a handmade butterfly bookmark adds a touch of whimsy and personality to your reading ritual. It's not just a placeholder—it's a tiny work of art that invites you to slow down and savor the moment.
Beyond the aesthetic appeal, crafting your own bookmark gives you full creative control. You can choose colors that match your favorite novel, add glitter for extra sparkle, or even incorporate pressed flowers for a botanical twist. Plus, the act of making it yourself connects you more deeply to your reading experience. Every time you use it, you'll feel a little surge of pride and joy.
And let's not forget: a DIY butterfly bookmark makes a thoughtful, heartfelt gift for fellow book lovers. Whether it's for a birthday, a book club exchange, or just because, it's a personalized treasure that costs pennies but means the world.
Gather Your Supplies: What You'll Need
Before you start, gather these simple supplies. Most are probably already in your craft stash!
– **Cardstock or heavy paper** (in colors of your choice)
– **Butterfly template** (print one online or draw your own)
– **Scissors**
– **Glue stick or double-sided tape**
– **Markers, colored pencils, or gel pens** for decorating
– **Optional embellishments:** glitter, sequins, washi tape, pressed flowers, ribbon
– **Laminator or clear contact paper** (for durability)
– **Hole punch and ribbon** (if you want a tassel)
A quick note: if you don't have cardstock, a cereal box works in a pinch! Just cover it with decorative paper. And remember, there's no 'right' way to decorate—let your imagination take flight.
Step-by-Step: Crafting Your Butterfly Bookmark
Follow these steps to create your magical bookmark:
1. **Choose your butterfly shape.** Print a template or sketch a simple butterfly with symmetrical wings. Classic monarch or whimsical fairy wings both work beautifully.
2. **Cut out the butterfly.** If you're using a template, trace it onto your cardstock and cut carefully. For a sturdier bookmark, cut two identical shapes.
3. **Decorate the wings.** This is where your personality shines! Use markers to draw patterns, add glitter for sparkle, or glue on sequins. Let your inner artist play.
4. **Assemble for durability.** Glue the two butterfly shapes back-to-back, sandwiching a ribbon loop at the top if you want a tassel. This also hides any marker bleed-through.
5. **Laminate or cover.** For a long-lasting bookmark, run it through a laminator or cover both sides with clear contact paper. Trim the edges.
6. **Add finishing touches.** Punch a hole at the top and thread a ribbon or yarn tassel. You can also attach a small bead or charm.
And there you have it—a beautiful butterfly bookmark ready to flutter between your pages!
Creative Variations to Make It Your Own
Once you've mastered the basic butterfly, try these playful twists:
– **Seasonal butterflies:** Use autumn leaf colors for fall, pastels for spring, or icy blues for winter.
– **3D wings:** Fold the wings slightly upward before laminating for a dimensional effect.
– **Magnetic bookmark:** Attach small magnets to the wings so it clips onto the page—no more slipping out!
– **Watercolor wonder:** Paint your cardstock with watercolors before cutting for a soft, dreamy look.
– **Book-themed:** Match the butterfly to the book you're reading—like a dragonfly for fantasy or a honeybee for a cozy mystery.
The possibilities are endless, so don't be afraid to experiment. Remember, the best bookmarks are the ones that make you smile every time you see them.
Pro Tips for a Professional Finish
Want your bookmark to look like it came from a boutique? Keep these tips in mind:
– **Use sharp scissors** for clean edges, especially around intricate wing details.
– **Work on a cutting mat** to protect your table and get precise cuts.
– **Test your markers** on a scrap piece first to avoid bleeding.
– **Seal with a clear coat** if you use chalk or watercolor to prevent smudging.
– **Add a personal touch** like a tiny quote or your initials on the back.
These small details elevate your craft from 'homemade' to 'handcrafted.' Plus, they ensure your bookmark withstands the test of time (and many page turns).
Troubleshooting Common Issues
Even the most seasoned crafter runs into snags. Here's how to fix them:
– **Wings tearing?** Reinforce with a second layer of cardstock or use a heavier weight paper.
– **Glue showing?** Use a glue stick sparingly and press firmly; double-sided tape is even cleaner.
– **Lamination bubbles?** Run the laminator slowly and smooth out air pockets with a ruler.
– **Ribbon fraying?** Dip the ends in clear nail polish or use a lighter to seal synthetic ribbons.
– **Colors fading?** Store your bookmark away from direct sunlight and use UV-resistant sealant.
With these fixes, you'll be a pro in no time. And remember, imperfections add character—embrace them!
The Hacks, Step by Step
- 1Choose Your Butterfly Design
Select a butterfly template or draw your own. Symmetrical wings work best for bookmarks. Consider the size—about 2×6 inches is ideal for most books. - 2Cut and Decorate
Trace and cut two identical butterfly shapes. Decorate both sides with markers, glitter, or collage. Let your creativity soar! - 3Assemble and Laminate
Glue the two shapes together with a ribbon loop at the top. Laminate or cover with contact paper for durability. Trim excess. - 4Add Finishing Touches
Punch a hole and add a tassel, bead, or charm. Sign your name on the back for a personal touch.
A handmade bookmark is a tiny love letter to your reading self—it says, 'This story matters, and so does the moment you spend inside it.'
Frequently Asked Questions
What materials do I need to make a DIY butterfly bookmark?
You'll need cardstock, scissors, glue, and decorative items like markers or glitter. Optional: laminator, ribbon, and a hole punch.
How do I make my butterfly bookmark last longer?
Laminate it or cover it with clear contact paper. This protects against wear and tear and keeps your decorations intact.
Can I make a butterfly bookmark without a template?
Absolutely! Just draw a simple butterfly shape on cardstock. Fold the paper in half to ensure symmetrical wings.
What are some creative variations for butterfly bookmarks?
Try 3D wings, magnetic clips, watercolor backgrounds, or seasonal themes. You can also add quotes or charms.
Is a DIY butterfly bookmark a good gift?
Yes! It's a thoughtful, personalized gift for readers of all ages. Pair it with a book for an extra special present.



Leave a Comment