
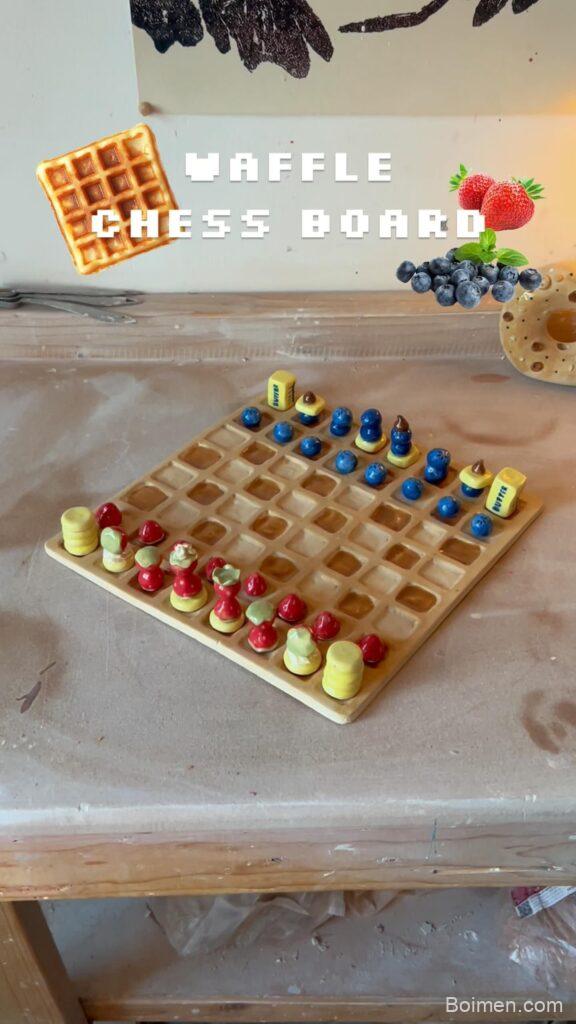
Imagine a chess set that makes you smile every time you pass by—pastel pawns, kitten knights, and a board that looks like a cozy picnic. These five hacks will help you turn your ceramic chess pieces into a charming work of art, even if you've never touched a kiln before.
Advertisements1
- Choose a theme early to guide all your design decisions.
- Simplify shapes for maximum cuteness—round and chunky beats spiky and intricate.
- Pastel glazes and blush details transform any piece into something adorable.
- Always test-glaze one piece before committing to the full set.
- Leave bottoms unglazed and use thin coats to avoid kiln disasters.
- Start small—a full set takes time, so enjoy the process and make it a project.
Why Cute Chess? The Art of Whimsy
Chess doesn't have to be all serious wood and stern kings. Adding a cute twist to ceramic pieces makes the game approachable, sparks joy in players young and old, and turns your set into a conversation piece. Think of it as giving a classic story new illustrations—you're not changing the plot, just making it more inviting.
In my ceramics studio, I've seen how a splash of pastel glaze or a tiny bunny ear can transform a standard set into something people can't stop touching. It's the same reason we love kawaii culture—it makes everyday objects feel like friends. And when you're playing a tense game, a smiley queen can lighten the mood.
Hack #1: Choose a Theme That Tells a Story
Before you sculpt a single pawn, pick a theme that excites you. Instead of generic 'good vs. evil,' think 'garden party'—where the white pieces are bunnies and the black pieces are hedgehogs. Or 'under the sea' with seahorse knights and starfish bishops. A theme gives you a clear direction for every piece, making decisions easier and your set cohesive.
My favorite theme? 'Forest friends'—white squirrels vs. black ravens. It's not just cute; it gives each piece a personality. When you're stuck on how to make a rook cute, ask: 'What would a squirrel castle look like?' That question alone can spark a dozen ideas.
Hack #2: Simplify Shapes for Maximum Charm
Cute doesn't mean complex. In fact, the most adorable ceramic pieces are often the simplest—think rounded bodies, tiny ears, and minimal details. Overly intricate designs can look cluttered and lose the 'aww' factor. Aim for pieces that are 2-3 inches tall, with a stable base and a clear silhouette.
When I teach beginners, I tell them to start with a teardrop shape for pawns—it reads as a little body with a head. Add two tiny leaf-shaped ears for a bunny, and you've got a pawn that's 90% cute with just 10% extra effort. The same logic applies to kings: a simple crown shape with a rounded top feels friendlier than a spiky medieval one.
Hack #3: Use Pastel Glazes and Blush Tones
Color is your secret weapon for cuteness. Pastel glazes—like mint green, baby pink, butter yellow, and sky blue—instantly soften the look of any piece. For a two-tone set, choose contrasting pastels: think lavender vs. peach. The softness makes the pieces look like they belong in a candy shop, not a battlefield.
Don't forget to add a 'blush' effect: a tiny dot of pink glaze on each cheek (or where cheeks would be) can make even a rook look bashful. I've tested this with dozens of students—adding blush is like putting a smile on the piece; it changes everything. Just be careful not to overdo it, or it looks like a rash.
Hack #4: Add Tiny Accessories for Personality
Little details—a miniature crown, a tiny bow, a flower on a pawn's head—give your pieces character and make them unmistakably yours. These can be made by rolling small coils of clay and attaching them with slip (liquid clay) before firing. Keep them proportional: a bow on a pawn should be no larger than a pea.
One of my favorite tricks is to give each queen a different flower on her head—like a tiny daisy or rose. It's a subtle way to differentiate pieces without confusing players. But remember: every accessory adds time and complexity. If you're making a full set (32 pieces), limit extra details to the royalty—kings, queens, and maybe knights—to keep the project manageable.
Hack #5: Glaze with Intention, Not Accident
Glazing is where many ceramics projects go wrong—colors bleed, drips form, and pieces stick to the kiln shelf. To avoid this, always apply 2-3 thin coats of glaze, letting each dry completely. Use a small brush for details, and leave the bottom of each piece unglazed to prevent sticking. If you're using underglazes for faces, fire them first at a lower temperature (cone 04) to set the color, then apply a clear glaze and fire again at the recommended cone.
I once ruined a set by overloading a brush with glaze—it pooled at the base and fused the pieces to the kiln. Lesson learned: patience beats perfection. Test a single piece before glazing the whole set, especially if you're mixing brands. And always read the glaze label—some are food-safe, some aren't, and you don't want to eat off a piece that isn't.
Bonus Hack: Make It a Gift or Family Project
A cute ceramic chess set isn't just for you—it's a perfect gift for a friend who loves games, or a family project to do over a weekend. Kids can help shape simple pieces like pawns, while adults handle the glazing. The result is a set that carries memories, making it even more special.
I've made sets as wedding gifts, and they're always a hit. The key is to start early—ceramics take time, from sculpting to drying to firing. Plan at least two weeks for a full set, including all firings. And if you're gifting, include a note about how to care for the pieces (hand wash, no microwave).
The Hacks, Step by Step
- 1Pick your theme
Choose a cute theme (like forest friends or garden party) and sketch out all 6 piece types (pawn, rook, knight, bishop, queen, king) as simple, rounded characters. This gives your set a cohesive story. - 2Sculpt test pieces
Create one pawn and one king as prototypes. Aim for 2-3 inches tall, with a wide base for stability. Test how they feel in your hand—if they're too wobbly, widen the base. - 3Attach details with slip
Use liquid clay (slip) to attach tiny ears, crowns, or flowers. Score both surfaces with a needle tool before applying slip to ensure a strong bond. Let pieces dry completely (1-2 days) before firing. - 4Fire to bisque
Fire your pieces to cone 04 (around 1945°F). This hardens the clay and prepares it for glazing. Let the kiln cool completely before opening. - 5Apply pastel glazes
Mix your glazes to pastel shades if needed (add white to lighten). Apply 2-3 thin coats with a soft brush, letting each dry. Use a fine brush for blush dots and facial features. - 6Fire to glaze temperature
Fire again to the recommended cone (often cone 5-6 for stoneware, or cone 06 for earthenware). Always leave the bottom unglazed to prevent sticking. Let cool, then admire your set! - 7Test and adjust
Before glazing all 32 pieces, test one piece to see how colors interact. If a glaze bleeds, thin it out or switch brands. Adjust your technique based on the test result. - 8Assemble your board
Find or make a board that complements your theme—a pastel checkerboard or a wooden board with painted squares. Place your pieces and enjoy your one-of-a-kind cute chess set!
Cuteness is a design choice, not an accident—it's the art of making something feel like a friend.
Frequently Asked Questions
How long does it take to make a ceramic chess set?
Expect at least 2 weeks from start to finish. Sculpting takes a few days, drying takes 1-2 days, and you'll need two firings with cooling time in between.
Can I make cute chess pieces without a pottery wheel?
Absolutely. Hand-building with coils and slabs is perfect for cute shapes. You don't need a wheel—just your hands and basic tools.
What type of clay is best for beginners?
A low-fire earthenware clay (like terracotta or white earthenware) is forgiving and fires at lower temperatures, making it ideal for beginners. It's also great for bright glazes.
How do I prevent my pieces from sticking to the kiln?
Leave the bottom of each piece unglazed. If you must glaze the bottom, use stilts or a kiln shelf with kiln wash. Always wipe the bottom clean before firing.
Can I use air-dry clay instead of kiln-fired clay?
Yes, but air-dry clay is less durable and not food-safe. For a functional game set that lasts, kiln-fired clay is better. If you're just decorating, air-dry is fine.



Leave a Comment