
Picture this: it is 12:07 on a gray Tuesday, your stomach is growling like a car engine that refuses to start, and the fridge offers you exactly three things – bread, cheese, and a lonely head of garlic. That is not a sad story. That is the opening scene of the best sandwich you will make all week.
Advertisements1
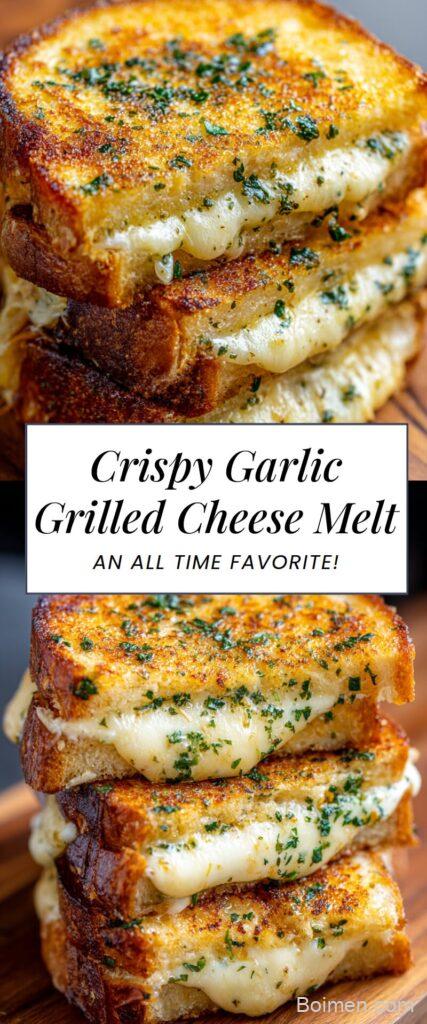
The Crispy Garlic Grilled Cheese Melt is what happens when you stop treating garlic as a background extra and hand it the lead role. Roasted until sweet and jammy, mashed into soft butter, then pressed against sourdough and sharp cheddar over medium-low heat until the crust crackles like autumn leaves and the cheese pulls in slow ribbons.
Think of it like a first draft of a poem: messy, buttery, a little imperfect around the edges, and absolutely worth finishing. You do not need fancy equipment. You need a skillet, a spatula, and about twenty minutes of patience you did not know you had.
Why You'll Love This Recipe
About the Ingredients
8 slices (about 340g) sourdough or country white bread, cut 1/2 inch thick
Day-old or lightly stale bread is actually better here because it holds up to butter and heat. In a pinch, use sturdy Texas toast or a rustic ciabatta; avoid soft sandwich loaves that collapse.
3 tablespoons (42g) unsalted butter, softened, divided
Softened butter spreads evenly and browns more predictably than cold butter. Salted butter works too – just skip the pinch of salt in the garlic mash.
1 whole head garlic (about 10 cloves), roasted
Look for a firm, tight head with dry papery skin and no green sprouts, which taste bitter. No time to roast? Use 1 teaspoon garlic paste whisked into the butter instead.
1/4 teaspoon kosher salt
Kosher salt dissolves into the garlic mash more smoothly than table salt. If using fine sea salt, start with a scant 1/8 teaspoon.
1/4 teaspoon freshly ground black pepper
Fresh-cracked pepper blooms in the warm butter; pre-ground works but tastes flatter. Add a pinch of red pepper flakes if you like a little heat.
2 tablespoons (28g) mayonnaise
Mayo spreads thinner than butter and browns to a deep golden crust – it is the secret to diner-style grilling. Greek yogurt is a tangy substitute, though it browns faster.
8 ounces (225g) sharp cheddar, shredded or thinly sliced
Sharp cheddar melts into gooey ribbons with a pleasant tang. For a stretchier pull, blend half cheddar with half low-moisture mozzarella.
2 ounces (55g) Gruyère or Swiss, shredded
Gruyère adds nutty depth and melts beautifully. Smoked provolone is a great swap if you want a campfire note.
2 tablespoons (about 6g) fresh parsley or chives, finely chopped (optional)
Herbs brighten the richness and add color. Dried oregano (1/2 teaspoon) is a fine substitute if fresh herbs are not around.
Tips & Tricks
Do not rush the heat
Medium-low (around 325F / 165C in the pan) is the sweet spot – high heat scorches the butter before the cheese even softens.
Grate your own cheese
Pre-shredded cheese is coated in anti-caking starch that resists melting; a block and a box grater take two minutes and change everything.
Press gently, not hard
A light press with a spatula helps contact without squeezing the melted cheese out the sides.
Rest for one minute
Letting the sandwich sit off heat for 60 seconds lets the cheese set slightly so it does not slide apart on the first bite.
Pro Tips
Step-by-Step Instructions
1. Roast the garlic
Heat the oven to 400F (200C). Slice the top quarter off the garlic head, drizzle with a teaspoon of olive oil, wrap in foil, and roast for 30 to 35 minutes until the cloves are soft and golden and squeeze out like toothpaste. Let cool 5 minutes.
2. Mash the garlic butter
Squeeze the roasted cloves into a small bowl and mash with 2 tablespoons of the softened butter, the salt, and the pepper until you have a smooth, fragrant paste. It should smell sweet, not sharp.
3. Build the flavor base
Spread the garlic butter evenly across the 4 interior bread faces, right to the edges. Pile the cheddar and Gruyère over 4 slices, dividing evenly, then close the sandwiches.
4. Butter the outsides
Spread the remaining 1 tablespoon softened butter mixed with the mayonnaise over the outsides of all 4 sandwiches. This is your crust – do not skimp on the corners.
5. Grill low and covered
Warm a large nonstick or cast-iron skillet over medium-low heat, about 325F (165C) on an instant-read thermometer. Add the sandwiches, cover, and cook 4 to 5 minutes until the underside is deep golden brown.
6. Flip and finish
Flip carefully with a spatula, press gently, and cook uncovered another 3 to 4 minutes until the second side is golden and the cheese is fully melted and bubbling at the edges. The internal cheese should read about 150F (65C).
7. Rest and slice
Slide the sandwiches onto a cutting board and rest 1 minute so the cheese sets just enough to hold. Cut on the diagonal, scatter with parsley if using, and serve immediately while the pull is at its best.
Delicious Variations
Honey-Chili Garlic Melt
Drizzle hot honey over the cheese before closing the sandwich for a sweet-heat contrast that cuts the richness.
Green Apple and Gruyère
Add thin slices of tart green apple and a pinch of thyme – the crunch plays beautifully against the melted garlic butter.
Pesto Garlic Melt
Swap the interior garlic butter for 2 tablespoons basil pesto and use mozzarella for a summery, herb-forward version.
How to Store Crispy Garlic Grilled Cheese Melt
Refrigerator
Store cooled sandwiches wrapped tightly in foil or an airtight container for up to 2 days. The crust will soften, so plan to re-crisp rather than eat cold.
Freezer
Freeze assembled, ungrilled sandwiches wrapped individually in parchment and foil for up to 2 months. Grill straight from frozen, adding 3 to 4 minutes per side over medium-low heat.
Reheating
Reheat in a 350F (175C) oven or air fryer for 5 to 6 minutes until the crust re-crisps and the cheese re-melts. Avoid the microwave, which turns sourdough rubbery.
Frequently Asked Questions
Q: Can I make this garlic grilled cheese ahead for a crowd?
Yes – assemble the sandwiches up to 4 hours ahead, wrap in parchment, and grill in batches just before serving. Hold finished sandwiches on a rack in a 200F (95C) oven so the bottoms stay crisp.
Now go raid that lonely head of garlic and give it the starring role it deserves. Your first sandwich might be a little lopsided and your butter might pool in one corner – perfect, that is how you learn the rhythm of your own pan. Make it once exactly as written, then start riffing: hot honey, apple slices, a different cheese. When you do, tell me which version won your kitchen. Keep your pen dancing.

Crispy Garlic Grilled Cheese Melt
This crispy garlic grilled cheese melt pairs golden buttered sourdough with molten cheddar and mellow roasted garlic for the ultimate cozy lunch.
🧂 Ingredients
- 8 slices (about 340g) sourdough or country white bread, cut 1/2 inch thick
- 3 tablespoons (42g) unsalted butter, softened, divided
- 1 whole head garlic (about 10 cloves), roasted
- 1/4 teaspoon kosher salt
- 1/4 teaspoon freshly ground black pepper
- 2 tablespoons (28g) mayonnaise
- 8 ounces (225g) sharp cheddar, shredded or thinly sliced
- 2 ounces (55g) Gruyère or Swiss, shredded
- 2 tablespoons (about 6g) fresh parsley or chives, finely chopped (optional)
📋 Instructions
- 1Roast the garlic — Heat the oven to 400F (200C). Slice the top quarter off the garlic head, drizzle with a teaspoon of olive oil, wrap in foil, and roast for 30 to 35 minutes until the cloves are soft and golden and squeeze out like toothpaste. Let cool 5 minutes.
- 2Mash the garlic butter — Squeeze the roasted cloves into a small bowl and mash with 2 tablespoons of the softened butter, the salt, and the pepper until you have a smooth, fragrant paste. It should smell sweet, not sharp.
- 3Build the flavor base — Spread the garlic butter evenly across the 4 interior bread faces, right to the edges. Pile the cheddar and Gruyère over 4 slices, dividing evenly, then close the sandwiches.
- 4Butter the outsides — Spread the remaining 1 tablespoon softened butter mixed with the mayonnaise over the outsides of all 4 sandwiches. This is your crust – do not skimp on the corners.
- 5Grill low and covered — Warm a large nonstick or cast-iron skillet over medium-low heat, about 325F (165C) on an instant-read thermometer. Add the sandwiches, cover, and cook 4 to 5 minutes until the underside is deep golden brown.
- 6Flip and finish — Flip carefully with a spatula, press gently, and cook uncovered another 3 to 4 minutes until the second side is golden and the cheese is fully melted and bubbling at the edges. The internal cheese should read about 150F (65C).
- 7Rest and slice — Slide the sandwiches onto a cutting board and rest 1 minute so the cheese sets just enough to hold. Cut on the diagonal, scatter with parsley if using, and serve immediately while the pull is at its best.

Priya explores creative writing prompts and storytelling techniques for aspiring authors. She shares exercises to spark imagination and build narrative confidence, drawn from her own writing practice.


Leave a Comment