
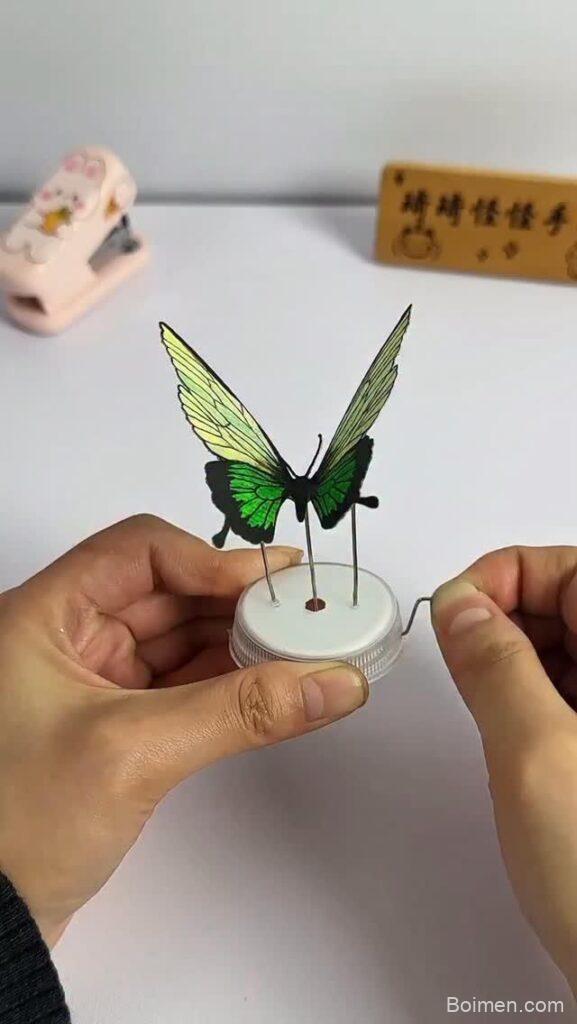
Paper is not flat—it breathes with light and shadow, and with a few deliberate moves, it can seem to lift off the page. These seven hacks will show you how to bring paper to life with techniques that are immediate, sensory, and deeply satisfying.
Advertisements1
- Scoring before folding prevents cracked spines and gives a professional crease.
- Moisture relaxes paper fibers, allowing you to shape and dry paper into permanent curves.
- Tearing damp paper creates organic deckled edges that scissors can't replicate.
- Layering translucent papers adds luminous depth without bulk.
- Everyday objects can emboss texture when rubbed with pressure.
- Side lighting transforms flat paper into a textured landscape.
Score, Don't Fold: The Art of the Crease
A clean fold is a quiet miracle. But if you simply bend paper, the fibers crush unevenly, leaving a cracked, whitish spine. Instead, score first: run a bone folder or the back of a spoon along a ruler, pressing just enough to compress the fibers without cutting them. I keep a 6-inch steel ruler and a Teflon bone folder on my desk; the Teflon glides without burnishing the surface. For cardstock, score at 50% depth—about 0.2 mm for 200 gsm paper. The result is a fold that feels like a hinge, not a wound.
The why: scoring pre-stretches the paper's cellulose bonds, so the fold happens along a controlled line, reducing stress and preventing cracking. It also gives you a crisp edge that catches light, adding a subtle dimension.
A common mistake is scoring too deeply, which weakens the paper and causes it to tear when folded. Test on a scrap first—if you can see a faint line but not a cut, you're close.
Dampen and Shape: The Power of Moisture
Water is paper's secret collaborator. Lightly mist a sheet with distilled water—just enough to make it cool to the touch, not soggy—then drape it over a mold or shape it with your fingers. As it dries, the fibers lock into new curves. I once turned a plain sheet of 90 lb watercolor paper into a shallow bowl by misting it and letting it dry over an inverted ceramic ramekin. The next morning, it held its form like a shell.
The why: moisture relaxes the hydrogen bonds between fibers, allowing them to slide and re-form as they dry. This is how traditional papermakers shape vessels.
Mistake to avoid: over-wetting, which causes the paper to pill or lose its sizing. Start with two or three light passes from 12 inches away, and wait 30 seconds before shaping.
Tear with Intention: Deckled Edges That Feel Alive
A torn edge has a softness that scissors can't mimic. To get a controlled deckle, dampen a line with a brush and gently pull the paper apart—the fibers separate naturally, leaving a feathered edge. For a more pronounced deckle, tear against a straightedge while pulling slightly upward. I use a 1-inch flat brush and a 12-inch metal ruler; the tear follows the damp line like a riverbank.
The why: tearing breaks fibers irregularly, creating a textured edge that absorbs light and shadow, giving the paper a handcrafted, organic feel.
Common mistake: tearing dry paper, which produces a jagged, fuzzy edge. Always dampen first—just a whisper of water is enough.
Layer with Light: Translucency as a Design Tool
Paper becomes luminous when layered. Choose sheets with different opacities—vellum, tracing paper, or thin Japanese kozo—and overlap them. The light passing through creates depth without adding bulk. I often stack a 17 gsm kozo over a 120 gsm cardstock; the kozo's fibers catch the light like frost on a window.
The why: translucent layers multiply the interplay of light and shadow, making the paper seem to glow from within. It's a cheap way to add dimension.
Mistake: using too many layers, which muddies the effect. Three is usually the limit before it turns murky.
Emboss with Everyday Objects: Texture from Nothing
You don't need a die-cut machine to emboss. Place your paper over a textured surface—a coin, a leaf skeleton, a piece of lace—and rub with a dry ballpoint pen or a bone folder. The raised areas transfer to the paper. I keep a collection of vintage buttons and a brass rubbing plate; a 30-second rub gives a subtle relief that begs to be touched.
The why: pressure compresses the paper's fibers, creating permanent raised or recessed areas that interact with raking light.
Mistake: pressing too hard, which can tear the paper. Use light, circular strokes and build up gradually.
Curl with a Pencil: Springs and Tendrils
To make paper curls that hold their shape, wrap strips around a pencil or dowel, then slide them off. For tighter curls, use a skewer; for looser waves, a 1-inch dowel. I like to curl 1/8-inch strips of quilling paper around a 1/16-inch slotted quilling tool—they become delicate tendrils that seem to grow.
The why: the paper takes a set because the fibers stretch on the outside of the curve and compress on the inside, locking in the spiral.
Mistake: curling damp paper, which can cause mold or uneven drying. Keep it dry unless you plan to shape and dry it fully.
Backlight and Shadow: The Final Touch
The fastest way to bring paper to life is to change how light hits it. Place your work near a window with diffused daylight, or use a small LED panel at a low angle. Shadows will reveal every fold, tear, and emboss. I often photograph my pieces at 4 p.m., when the sun is low and warm—the paper seems to breathe.
The why: raking light emphasizes texture and depth, making the paper's surface a landscape rather than a flat plane.
Mistake: using harsh, direct light that flattens the texture. Aim for soft, directional light from the side.
The Hacks, Step by Step
- 1Score before folding
Use a bone folder and ruler to compress fibers along the fold line. This prevents cracking and gives a crisp edge. - 2Mist and shape
Lightly mist paper with distilled water, then drape over a mold. Let it dry to lock in curves. - 3Tear along a damp line
Brush water along a straightedge, then gently pull the paper apart for a soft deckled edge. - 4Layer translucent sheets
Overlap vellum or kozo with cardstock to create luminous depth. - 5Rub to emboss
Place paper over a textured object and rub with a bone folder or dry pen to transfer relief. - 6Curl around a dowel
Wrap strips around a pencil or skewer, slide off, and let them hold their spiral. - 7Light from the side
Use low-angle, diffused light to reveal texture and shadow.
Paper is not a surface; it's a structure waiting for light and moisture to reveal its life.
Frequently Asked Questions
How do you make paper look 3D?
Score, fold, and layer with translucent sheets to create depth. Side lighting enhances the effect.
What can I use to emboss paper without a machine?
A bone folder or dry ballpoint pen rubbed over a textured object like a coin or lace will emboss paper.
How do you curl paper without tearing it?
Wrap dry paper strips around a dowel or pencil, then slide them off. Avoid damp paper unless you dry it fully.
What is the best way to fold cardstock without cracking?
Score first with a bone folder along a ruler, then fold. This compresses fibers and prevents cracking.
Can you shape paper with water?
Yes, lightly mist with distilled water, shape over a mold, and let it dry. The fibers will hold the new form.



Leave a Comment