
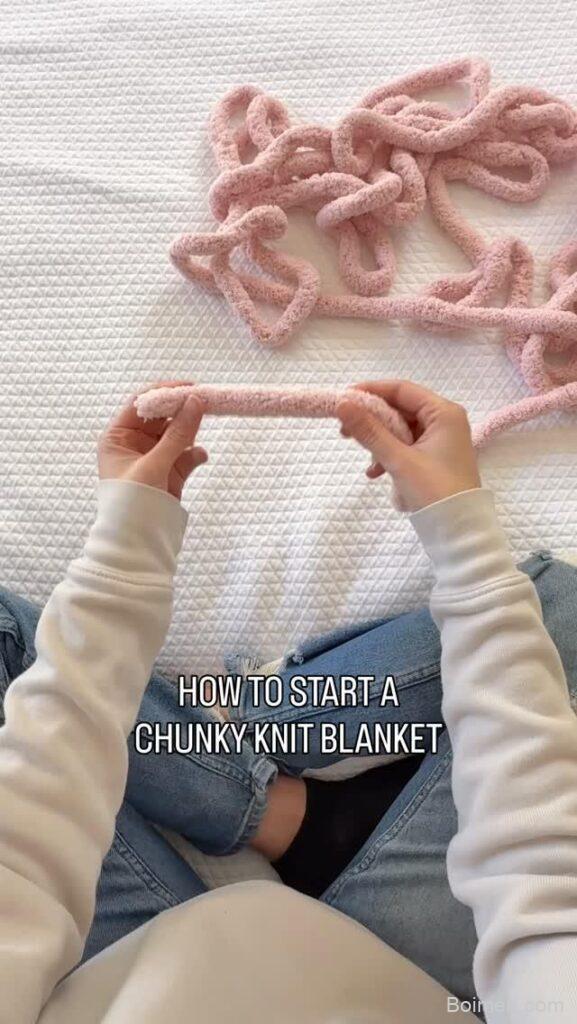
Most beginners fail at chunky hand knit blankets because they choose the wrong yarn weight or cast on too many stitches, leading to a loose, misshapen mess. This guide gives you seven specific, immediately actionable hacks to start your blanket right the first time, each with the reasoning behind it and the mistake to avoid.
Advertisements1
- Yarn diameter should be 0.75–1.25 inches—thicker yarn creates gaps and instability.
- Use the 3-stitch rule: 3 stitches per 4 inches of width for balanced proportions.
- Cast on loosely with the long tail method to avoid a flared bottom edge.
- Join yarn with felting (for wool) or Russian join (for synthetics) to avoid knots.
- Block your finished blanket to set the shape and prevent curling.
Hack 1: Match Yarn Weight to Your Arm Span (Not Your Needle Size)
Chunky hand knit blankets are made with super bulky yarn (typically 6-7 wraps per inch) and no needles—your arms are the tools. The problem is that most beginners grab the thickest yarn they can find, thinking it will knit up faster. In reality, yarn thicker than 1.5 inches in diameter becomes unwieldy and creates gaps that won't close. For a blanket that drapes well and stays together, choose a roving-style yarn between 0.75 and 1.25 inches in diameter. A good rule: your yarn should be roughly the width of your thumb. If it's wider than two fingers, it's too thick for a first project. Compare: 0.75-inch yarn gives a tighter, more durable blanket (better for daily use); 1-inch yarn is ideal for a soft, airy throw. Avoid anything over 1.25 inches unless you want a loosely woven look that snags easily. Quick win: before buying, wrap the yarn around your arm once—if it feels bulky and stiff, size down.
Hack 2: Cast On with the 'Long Tail' Method for Stretch and Neat Edges
The cast-on is the foundation of your blanket, and a sloppy one will haunt you. The long tail cast-on (also called the slingshot method) creates a stretchy, even edge that matches the rest of your fabric. Here's why it works: it mimics a knit stitch, so the bottom edge looks consistent and won't pucker. To do it, leave a tail about 4 times the width of your desired blanket (for a 40-inch blanket, leave a 160-inch tail—yes, really). Make a slip knot, then use your thumb and index finger to create the 'slingshot' and loop the yarn. Common mistake: casting on too tightly. Your cast-on should slide easily along your arm; if it's tight, your blanket will flare at the bottom. Quick win: practice the motion with a piece of scrap yarn before committing to your good yarn.
Hack 3: Calculate Stitch Count with the '3-Stitch Rule' for Balanced Proportions
Stitch count determines your blanket's width, and most beginners guess wrong. The 3-stitch rule: for every 4 inches of desired width, cast on 3 stitches. So a 40-inch-wide blanket needs 30 stitches. This works because chunky hand knit stitches typically measure about 1.33 inches wide when worked at a medium tension. If you want a tighter gauge (stiffer fabric), use 4 stitches per 4 inches; for a looser drape, use 2.5. But stick to whole numbers. Common mistake: casting on an even number when you plan to add a border—borders often require an odd number for symmetry. Always test with a 10-stitch swatch and measure. Quick win: use a fabric measuring tape to check your swatch width after 5 rows; adjust hook size (your fingers) accordingly.
Hack 4: Use the 'Knitting Off' Bind-Off to Prevent Curling
A chunky blanket that curls at the edges looks amateur. The bind-off (or cast-off) is where many beginners rush, but a proper bind-off gives a clean, non-curling edge. The 'knitting off' method—where you lift the first stitch over the second—works well for hand knitting because it maintains the stitch pattern's elasticity. The key is to bind off loosely: your last stitch should be as wide as the others. Why it works: a tight bind-off restricts the fabric, causing it to pull inward and curl. Common mistake: binding off too tightly, especially on the last few stitches. To avoid this, use your thumb to hold the loop open as you pass the stitch over. Quick win: after binding off, gently stretch the edge horizontally; it should spring back without distortion.
Hack 5: Join New Yarn with the 'Felting Method' for Invisible Seams
Chunky blankets often require multiple skeins, and how you join them affects both looks and durability. The felting method works best for wool and wool-blend rovings: overlap the ends of the old and new yarn by about 4 inches, then rub them together between your palms with a little water and soap until they felt into one continuous strand. This creates a seamless join that won't come undone. Why it works: the natural scales in wool fibers lock together when agitated, forming a strong bond. Common mistake: using a knot—it creates a bump and can unravel. If you're using synthetic yarn, try the 'Russian join' instead: thread the ends through each other with a tapestry needle. Quick win: always test your join by tugging firmly before continuing to knit.
Hack 6: Set Up a 'Stitch Marker' System to Track Rows Without Counting
Losing track of rows is the silent killer of chunky blankets—you end up with an uneven rectangle. Use stitch markers (or safety pins) every 10 rows to mark your progress. This visual system lets you see at a glance how many rows you've completed without recounting. Why it works: chunky stitches are large, so counting is tedious; markers break the blanket into manageable segments. Common mistake: placing markers on the wrong side—always mark the same side (e.g., the right side) so you don't get confused. Quick win: use a removable marker every 5 rows if you're a beginner; it's easier to count to 5 than 10.
Hack 7: Block Your Blanket Immediately to Set the Shape
Blocking is the secret to a professional-looking chunky blanket, but most beginners skip it. Blocking involves dampening the blanket and pinning it to the desired dimensions to dry. For chunky knits, 'spray blocking' works best: mist the blanket lightly with water, shape it with your hands, and let it dry flat. Why it works: moisture relaxes the fibers, allowing them to settle into an even fabric and preventing curling. Common mistake: soaking the blanket—chunky yarn can become heavy and stretch out of shape. Quick win: block on a clean sheet or blocking mats in a spare room where it won't be disturbed for 24 hours.
The Hacks, Step by Step
- 1Choose the right yarn weight
Select super bulky yarn (0.75–1.25 inches in diameter) that matches your thumb width. Avoid anything thicker than 1.25 inches to prevent gaps and instability. - 2Calculate stitch count with the 3-stitch rule
For every 4 inches of desired width, cast on 3 stitches. For a 40-inch blanket, cast on 30 stitches. Adjust for tension by making a small swatch first. - 3Cast on using the long tail method
Leave a tail 4 times the blanket width, create a slip knot, and use the slingshot motion to cast on loosely. This ensures a stretchy, even edge. - 4Knit with consistent tension
Work stitches using your arms as needles, keeping each stitch the same size. Check every 10 rows with a stitch marker to maintain evenness. - 5Join new yarn with the felting method
Overlap ends by 4 inches and felt them together with water and soap. This creates a seamless, strong join without knots. - 6Bind off loosely
Use the knitting-off method, keeping the bind-off as loose as your stitches. This prevents curling and gives a clean edge. - 7Block your blanket
Mist lightly with water, shape to desired dimensions, and dry flat for 24 hours. This sets the shape and evens out the fabric.
The difference between a homemade-looking chunky blanket and a professional one is in the details: a loose cast-on, a proper join, and a good block.
Frequently Asked Questions
How many stitches do I need for a chunky hand knit blanket?
Use the 3-stitch rule: 3 stitches for every 4 inches of desired width. For a typical 40-inch throw, cast on 30 stitches. Adjust based on your tension—make a small swatch to confirm.
What is the best yarn for a chunky hand knit blanket?
Super bulky roving yarn (0.75–1.25 inches in diameter) is ideal. Wool or wool blends felt well for joins and hold their shape. Avoid synthetic yarns if you plan to felt; they require alternative joins.
Can I hand knit a blanket without needles?
Yes, chunky hand knitting uses your arms as needles. You'll need a super bulky yarn and a large surface. The technique is simple: cast on with your hands, then use your arms to form stitches.
How do I keep my chunky blanket from curling?
Bind off loosely and block the blanket after finishing. Blocking involves misting with water and shaping it flat to dry, which relaxes the fibers and prevents curling.
How long does it take to hand knit a chunky blanket?
A 40×60-inch blanket typically takes 3–5 hours for a beginner, depending on yarn thickness and tension. Using thicker yarn (1 inch) can reduce time, but may compromise durability.



Leave a Comment