
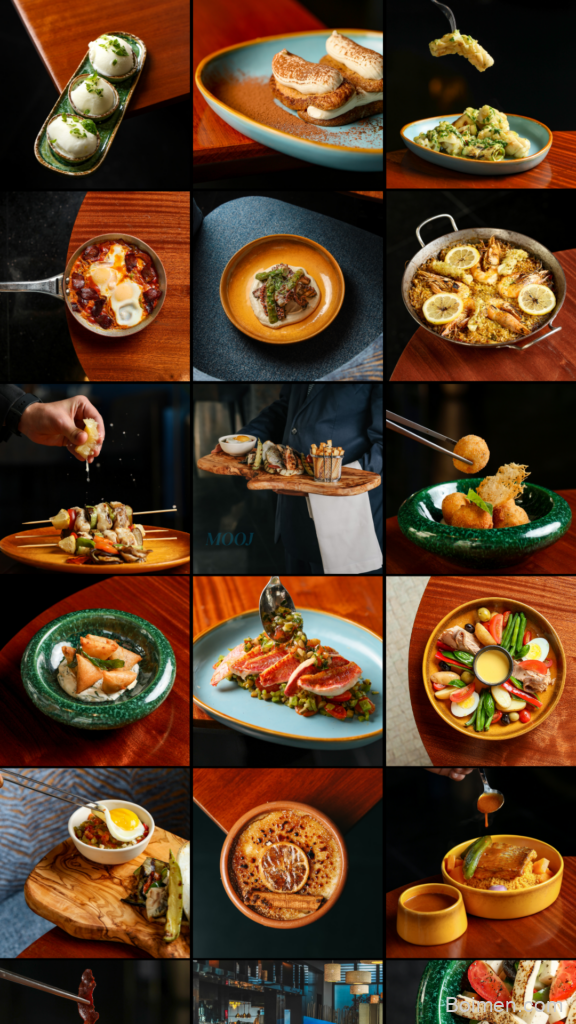
The problem is rarely the food; it is the feed. Restaurants post one beautiful plate, then vanish for nine days, and the algorithm forgets them. A repeatable shoot day fixes that faster than any new camera.
Advertisements1
This plan treats your menu like a small production line: six plates, one window, one lens, one caption template. You cook in two waves, style in batches, and shoot every angle while the light is stable.
Nothing here needs a studio. A north-facing window, a sheet of white foam board, and a phone at 45 degrees will out-perform most rented gear, because consistency beats novelty in a feed.
Why You'll Love This Recipe
About the Ingredients
6 portions restaurant-style plating components (protein, starch, vegetable, sauce)
Use whatever is already on your menu so the feed matches what guests actually order. If a dish is seasonal, swap in your best-selling alternative rather than inventing a new one.
2 tbsp (30 ml) neutral oil for searing and touch-ups
Grapeseed or refined canola holds up to high heat without smoking. Avoid extra-virgin olive oil for searing; it burns below 400F (205C).
1 sheet white foam board, 20 x 30 in (50 x 76 cm)
This is your bounce card and background in one. A white poster board from any stationery shop works identically and costs less.
1 matte ceramic plate in a neutral tone, 10 in (25 cm)
Matte surfaces kill glare that glossy plates throw back at the lens. If you only own glossy, angle the plate 10 degrees away from the window.
Fresh herb garnish: 1 bunch parsley or cilantro
Herbs should be picked, not chopped, for camera work; torn leaves hold shape longer under warm light. Swap in microgreens if your dishes are delicate.
1 lemon, cut into wedges
Lemon wedges add a color anchor and a height element to flat lays. Lime or a halved cherry tomato gives the same visual function.
Flaky sea salt, 1 tsp, for finishing
Large flakes read as texture on camera where fine salt disappears. Coarse kosher salt is an acceptable substitute if flakes are unavailable.
1 lint-free microfiber cloth
Wipe plate rims before every frame; a single smudge is the most common reason a good shot gets rejected in editing.
1 phone tripod with a 45-degree and overhead position marked
Mark both positions with tape on the table so every plate is shot from identical angles. A stack of books works if you do not own a tripod.
Tips & Tricks
Shoot the messiest plate last
reserve your ugliest but most delicious-looking portion for the close-up, because texture reads better than symmetry at macro distance.
Style with undercooked elements
sauce should be slightly looser and vegetables a touch brighter than you would serve, since cameras flatten saturation and heat dries surfaces within 90 seconds.
- Lock exposure and white balance before the first plate: tap and hold on the plate, then drag the exposure slider down slightly so highlights on sauce do not clip.
- Keep a shot list on paper beside the tripod: hero, 45-degree, overhead, hand-in-frame, and a 7-second pour or pull; five frames per plate is enough for a week of posts.
Pro Tips
Step-by-Step Instructions
1. Map the shot list
Write five frames per plate on paper: hero at 45 degrees, overhead flat lay, hand-in-frame, texture close-up, and a short motion clip. Deciding before you cook prevents the mid-shoot hesitation that eats your light window.
2. Set the light station
Place a table beside a north or east-facing window and tape your tripod positions. Diffuse direct sun with a white curtain so highlights stay soft; direct sun at midday creates hard shadows that read as amateur on a feed.
3. Cook wave one
Prepare the first three plates, searing proteins in a skillet over medium-high heat at 400F (205C) for 3 to 4 minutes per side until deeply golden brown and the internal temperature reads 165F (74C). Hold them warm at 150F (65C) in a low oven, uncovered, so surfaces stay dry.
4. Style plate one
Wipe the rim, build height with the starch, and place the protein off-center. Add sauce in three separate dots rather than one pool, then finish with flaky salt and picked herbs for texture in the frame.
5. Shoot all five frames
Lock focus and exposure on the plate, then work through your list without restyling between frames. Move the phone, not the food; this keeps styling intact and cuts the shoot to under four minutes per plate.
6. Refresh and shoot plate two
Re-wipe the rim, re-dot any sauce that has dulled, and swap the garnish, which wilts fastest under warm light. Shoot immediately; a plated dish loses camera appeal after about 90 seconds.
7. Cook and shoot wave two
Repeat the cook-and-shoot cycle for the remaining three plates while the light is still consistent. Keep the same plate, background, and angle so the resulting grid reads as one deliberate series.
8. Select and caption
Pick one hero per plate, apply one preset to the whole set, and fill your caption template: dish name, one ingredient story, price, and a save-worthy tip. Consistency in editing matters more than any single frame.
Delicious Variations
Flat lay series
shoot all six plates overhead on the same background for a grid that tiles cleanly across three rows.
Motion-first
prioritize 7-second clips of pours, pulls, and steam, then post stills as carousel slides behind the video.
Guest-hands edition
include a diner's hands lifting a fork or tearing bread to add scale and warmth to otherwise static plates.
How to Store Idée de Feed Instagram Restaurant
Refrigerator
Store cooked components in separate airtight containers for up to 3 days; keep sauces and garnishes apart so plates can be restyled without sogginess.
Freezer
Freeze protein and starch components only, up to 2 months, wrapped tightly; do not freeze plated sauces or fresh herbs, which break down and lose camera appeal.
Reheating
Reheat proteins in a 350F (175C) oven for 8 to 10 minutes until the internal temperature reaches 165F (74C), then re-plate with fresh garnish and sauce for the reshoot.
Frequently Asked Questions
Q: How many photos should I post from one restaurant shoot?
Aim for five to seven usable posts from a single session, spread across one to two weeks. That volume keeps your feed active without burning through content in three days.
Q: Do I need a professional camera for a restaurant Instagram feed?
No, a modern phone in good window light outperforms an unfamiliar camera for most restaurant posts. Consistency, styling, and captions drive engagement more than sensor size.
Q: What is the best time of day to photograph restaurant food?
Indirect daylight, usually mid-morning or late afternoon near a north-facing window, gives the most controllable results. Direct midday sun creates harsh shadows and blown-out highlights on sauce.
Q: How do I keep a consistent look across my Instagram feed?
Fix three variables: one background, one lens or zoom level, and one editing preset. Changing any of those between posts is what makes a grid look assembled rather than designed.
Q: How long does a plated dish stay camera-ready?
About 90 seconds before sauces dull and herbs wilt under warm light. Style, shoot, and move on; restyling a plate mid-shoot costs more time than reshooting it fresh.
Block ninety minutes this week, cook two waves, and shoot to a written list. Then look at your grid and ask yourself honestly: does it look like one restaurant, or six different ones? Stay focused, stay light.

Idée de Feed Instagram Restaurant
Idée de Feed Instagram Restaurant: build a scroll-stopping feed of 6 styled plates in one 50-minute session with a reusable shot list and captions.
🧂 Ingredients
- 6 portions restaurant-style plating components (protein, starch, vegetable, sauce)
- 2 tbsp (30 ml) neutral oil for searing and touch-ups
- 1 sheet white foam board, 20 x 30 in (50 x 76 cm)
- 1 matte ceramic plate in a neutral tone, 10 in (25 cm)
- Fresh herb garnish: 1 bunch parsley or cilantro
- 1 lemon, cut into wedges
- Flaky sea salt, 1 tsp, for finishing
- 1 lint-free microfiber cloth
- 1 phone tripod with a 45-degree and overhead position marked
📋 Instructions
- 1Map the shot list — Write five frames per plate on paper: hero at 45 degrees, overhead flat lay, hand-in-frame, texture close-up, and a short motion clip. Deciding before you cook prevents the mid-shoot hesitation that eats your light window.
- 2Set the light station — Place a table beside a north or east-facing window and tape your tripod positions. Diffuse direct sun with a white curtain so highlights stay soft; direct sun at midday creates hard shadows that read as amateur on a feed.
- 3Cook wave one — Prepare the first three plates, searing proteins in a skillet over medium-high heat at 400F (205C) for 3 to 4 minutes per side until deeply golden brown and the internal temperature reads 165F (74C). Hold them warm at 150F (65C) in a low oven, uncovered, so surfaces stay dry.
- 4Style plate one — Wipe the rim, build height with the starch, and place the protein off-center. Add sauce in three separate dots rather than one pool, then finish with flaky salt and picked herbs for texture in the frame.
- 5Shoot all five frames — Lock focus and exposure on the plate, then work through your list without restyling between frames. Move the phone, not the food; this keeps styling intact and cuts the shoot to under four minutes per plate.
- 6Refresh and shoot plate two — Re-wipe the rim, re-dot any sauce that has dulled, and swap the garnish, which wilts fastest under warm light. Shoot immediately; a plated dish loses camera appeal after about 90 seconds.
- 7Cook and shoot wave two — Repeat the cook-and-shoot cycle for the remaining three plates while the light is still consistent. Keep the same plate, background, and angle so the resulting grid reads as one deliberate series.
- 8Select and caption — Pick one hero per plate, apply one preset to the whole set, and fill your caption template: dish name, one ingredient story, price, and a save-worthy tip. Consistency in editing matters more than any single frame.

Kenji covers tech productivity and digital minimalism for remote workers. He writes about streamlining workflows and cutting digital clutter with a focus on mental clarity, not just efficiency.


Leave a Comment