
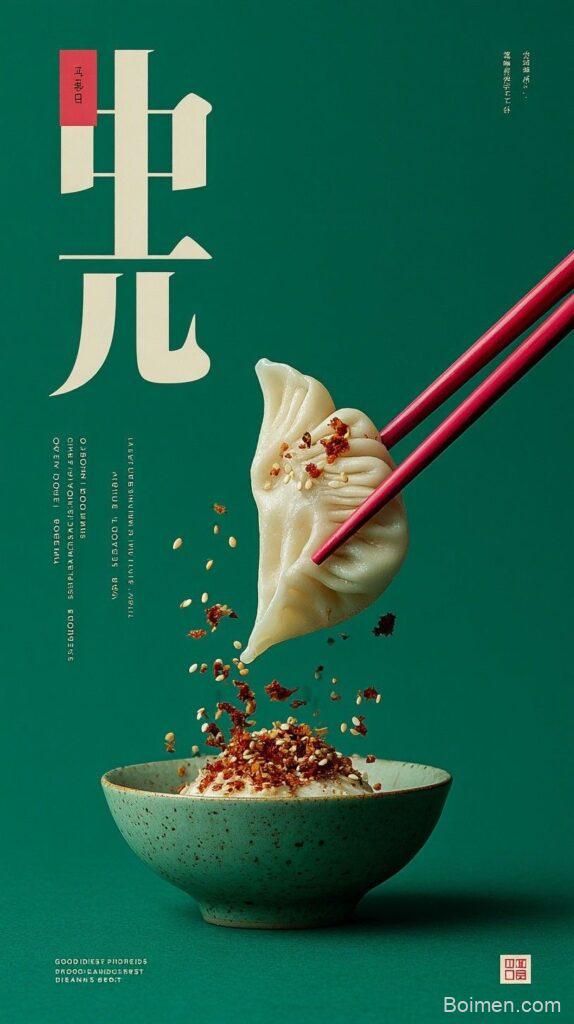
Let's be honest: you have scrolled past a thousand food photos today, and you remember exactly zero of them. Why? Because most of them look like they were taken by a potato holding a flashlight. Pinterest Image is not a dish you eat, it is a dish you make with your camera, and it is the difference between a pin that gets saved and a pin that gets scrolled past like a bad text message.
Advertisements1
Think of it like this: a recipe is the meal, but a Pinterest Image is the plate it is served on. One is nutrition, the other is appetite. If you have ever wondered why some bloggers get thousands of clicks and others get crickets, the answer is almost never the recipe, it is the visual first impression.
In this guide, I will walk you through the exact steps to create a scroll-stopping Pinterest Image, from lighting and props to composition and export settings. No fancy studio required, just a window, a table, and a little bit of patience. Stay curious, stay safe.
Why You'll Love This Recipe
About the Ingredients
1 large window with indirect natural light
North-facing windows are ideal because they give soft, even light all day. If you only have a south-facing window, hang a sheer white curtain to diffuse the harshness.
1 clean, neutral background surface (marble, wood, or linen)
A large white foam board or a smooth wooden cutting board works perfectly. Avoid busy granite or shiny glass, which create distracting reflections.
2-3 small props (fresh herbs, a linen napkin, a vintage spoon)
Props should support the dish, not steal the show. A sprig of parsley or a scattering of crumbs adds life; a giant bouquet does not.
1 dish of prepared food, freshly plated
Shoot within 5 minutes of plating so steam, color, and texture are at their peak. Cold food looks cold, and cold food does not get saved.
1 smartphone or camera with manual focus
Any phone from the last 5 years works. Tap to focus on the hero element, usually the most textured or colorful part of the dish.
1 tripod or stack of books for stability
A $15 phone tripod beats shaky hands every time. If you do not have one, a stack of cookbooks works just fine.
1 editing app (Lightroom Mobile, Snapseed, or Canva)
Free versions are plenty. You are adjusting exposure, contrast, and warmth, not performing surgery.
1 vertical crop guide (2:3 ratio)
Pinterest favors vertical images at 1000 x 1500 pixels. Crop tight, leave breathing room at the top for a text overlay.
Tips & Tricks
Avoid Harsh Direct Sunlight
Direct sun creates blown-out highlights and harsh shadows that make food look greasy. Shoot near a window but out of the direct beam, or diffuse with a sheer curtain.
Do Not Overcrowd the Frame
A cluttered Pinterest Image confuses the eye and kills the appetite. Pick one hero element, place it slightly off-center, and let the rest of the frame breathe.
Edit Gently
Over-editing makes food look plastic and unnatural. Nudge exposure and warmth, then stop. If you cannot tell it was edited, you did it right.
Pro Tips
Step-by-Step Instructions
1. Set Up Your Light
Place your table near a window with indirect natural light, ideally between 10 a.m. and 2 p.m. when the light is soft and even. Turn off all overhead lights, because mixed lighting creates ugly color casts that are a pain to fix later.
2. Style the Background
Lay down your neutral surface, whether that is marble, wood, or linen. Keep it simple and clean, because the background is the stage, not the star of the show.
3. Plate the Hero Dish
Plate your food within 5 minutes of shooting so it looks fresh and appetizing. Wipe the rim of the plate with a damp cloth, because a smudged rim is the food photography equivalent of spinach in your teeth.
4. Add Supporting Props
Tuck in 2-3 small props like a linen napkin, a scattering of fresh herbs, or a vintage spoon. Arrange them so they frame the dish without covering it, and remember: less is more.
5. Position Your Camera
Set your camera or phone at a 45-degree angle for most dishes, or directly overhead for flat lays like pizza or charcuterie. Tap to focus on the most textured part of the food, then lock focus if your phone allows it.
6. Shoot Multiple Angles
Take at least 10-15 shots from slightly different heights and distances. Move your body, not just the camera, because small shifts in angle change the light dramatically.
7. Edit Lightly
Open your favorite editing app and bump exposure, contrast, and warmth just slightly. Increase clarity a touch for texture, then stop before the food starts looking like a plastic display model.
8. Crop and Export
Crop to a vertical 2:3 ratio at 1000 x 1500 pixels, leaving space at the top for a text overlay. Export as a high-quality JPEG under 2MB so Pinterest loads it fast.
Delicious Variations
Moody Dark Mode
Use a dark wood board, a black backdrop, and side lighting for a dramatic, restaurant-style Pinterest Image.
Bright and Airy
Use a white marble surface, a sheer curtain, and overexposed highlights for a clean, minimalist look.
Action Shot
Drizzle, sprinkle, or pour something over the dish mid-shoot for a dynamic, thumb-stopping Pinterest Image.
How to Store Pinterest Image
Refrigerator
Store the actual food in an airtight container for up to 3 days, but never store the styled shot, because leftovers do not photograph well.
Freezer
Freeze the food if it is freezable, but keep your exported Pinterest Image files backed up in cloud storage instead.
Reheating
Reheat food gently on the stovetop or in the microwave, then re-plate and reshoot if you need a fresh Pinterest Image.
Frequently Asked Questions
Q: What size should a Pinterest image be?
The ideal Pinterest image size is 1000 x 1500 pixels with a 2:3 vertical ratio. This ratio takes up the most vertical space in the feed and gives you room for a text overlay at the top.
Q: Do I need a professional camera for Pinterest images?
No, a modern smartphone is more than enough for a great Pinterest Image. Good natural light and thoughtful styling matter far more than the camera itself.
Q: How do I make my food photos look professional?
Shoot near a window with indirect light, use a clean neutral background, and edit gently. Professional-looking food photos are 80 percent lighting and styling, and only 20 percent gear.
Q: Should I add text to my Pinterest image?
Yes, adding a short text overlay with the recipe name and a benefit like Easy or 30-Minute boosts saves and clicks. Keep the font bold, readable, and no more than 6 words.
Q: Why are my Pinterest images not getting clicks?
Your Pinterest Image is probably too dark, too cluttered, or missing a text overlay. Brighten the exposure, simplify the composition, and add a clear title to fix it fast.
Grab your phone, find your brightest window, and shoot your first Pinterest Image today. Once you see how a little styling transforms your food photos, you will never post a flat, dim snapshot again. Stay curious, stay safe.

Pinterest Image
Pinterest Image is a stunning, shareable food photo concept that turns any dish into a scroll-stopping pin. Learn to style, shoot, and post it today.
🧂 Ingredients
- 1 large window with indirect natural light
- 1 clean, neutral background surface (marble, wood, or linen)
- 2-3 small props (fresh herbs, a linen napkin, a vintage spoon)
- 1 dish of prepared food, freshly plated
- 1 smartphone or camera with manual focus
- 1 tripod or stack of books for stability
- 1 editing app (Lightroom Mobile, Snapseed, or Canva)
- 1 vertical crop guide (2:3 ratio)
📋 Instructions
- 1Set Up Your Light — Place your table near a window with indirect natural light, ideally between 10 a.m. and 2 p.m. when the light is soft and even. Turn off all overhead lights, because mixed lighting creates ugly color casts that are a pain to fix later.
- 2Style the Background — Lay down your neutral surface, whether that is marble, wood, or linen. Keep it simple and clean, because the background is the stage, not the star of the show.
- 3Plate the Hero Dish — Plate your food within 5 minutes of shooting so it looks fresh and appetizing. Wipe the rim of the plate with a damp cloth, because a smudged rim is the food photography equivalent of spinach in your teeth.
- 4Add Supporting Props — Tuck in 2-3 small props like a linen napkin, a scattering of fresh herbs, or a vintage spoon. Arrange them so they frame the dish without covering it, and remember: less is more.
- 5Position Your Camera — Set your camera or phone at a 45-degree angle for most dishes, or directly overhead for flat lays like pizza or charcuterie. Tap to focus on the most textured part of the food, then lock focus if your phone allows it.
- 6Shoot Multiple Angles — Take at least 10-15 shots from slightly different heights and distances. Move your body, not just the camera, because small shifts in angle change the light dramatically.
- 7Edit Lightly — Open your favorite editing app and bump exposure, contrast, and warmth just slightly. Increase clarity a touch for texture, then stop before the food starts looking like a plastic display model.
- 8Crop and Export — Crop to a vertical 2:3 ratio at 1000 x 1500 pixels, leaving space at the top for a text overlay. Export as a high-quality JPEG under 2MB so Pinterest loads it fast.

Kwame writes about technology and digital privacy for everyday users. He breaks down complex topics like data tracking and encryption into simple, relatable terms.


Leave a Comment