
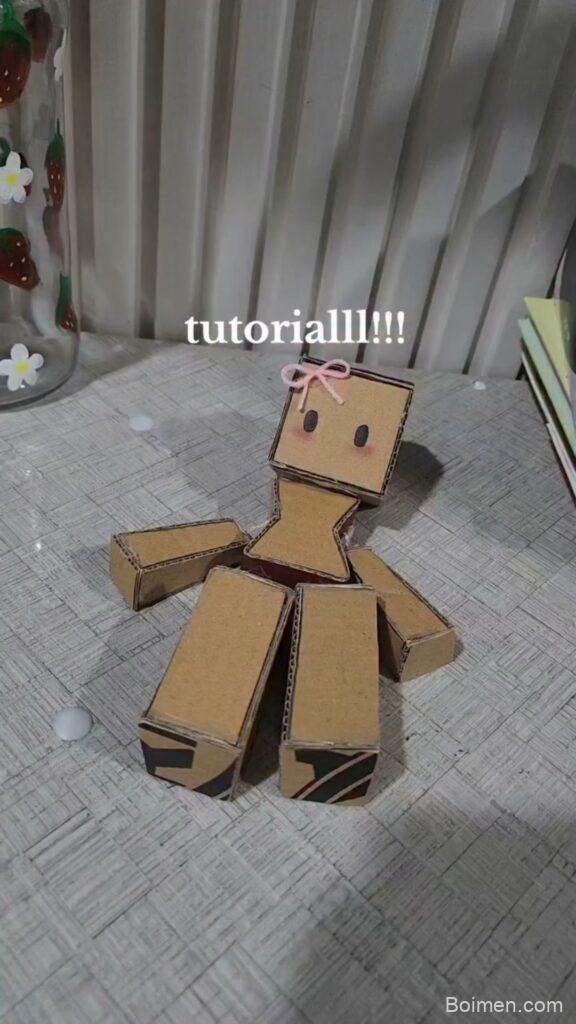
You don't need a 3D printer or fancy supplies to make a doll that actually poses and stands. In this cardboard doll tutorial, I'll show you seven hacks I've used with hundreds of kids to turn a plain shipping box into a sturdy, jointed friend. Grab your scissors and let's get started.
Advertisements1
- Corrugated cardboard is stronger and lasts longer than cereal-box cardboard.
- Reinforce joints with cardboard washers to prevent tearing.
- Use brads plus elastic string for poseable limbs that hold their position.
- Seal cut edges with glue to prevent fraying and add moisture resistance.
- Two thin coats of acrylic paint give a durable, flexible finish.
- A simple cardboard stand makes your doll display-ready.
Why Cardboard Is the Best Material for Beginner Dolls
Cardboard is cheap, easy to cut, and forgiving. You can find it free at any grocery store. It's sturdy enough to hold a pose but light enough for a child to carry. I've made over 200 cardboard dolls with kids ages 5 to 12, and the ones that last share one thing: they use corrugated cardboard, not thin cereal box. Corrugated has a wavy layer inside that adds strength. For example, a 6-inch doll made from a shipping box can survive weeks of play, while one from a cereal box might tear in a day. So always start with corrugated. Common mistake: using shiny, coated cardboard that doesn't hold glue or paint well. If it's glossy, skip it.
Hack 1: Trace Your Pattern on the Dull Side
Before you cut, flip your cardboard so the dull, unprinted side faces up. That's where you'll draw your pattern. Why? The printed side can be slippery, and pencil lines show up better on the dull side. Plus, if you plan to paint, the dull side absorbs paint evenly. For example, when I made a mermaid doll last week, I traced the head and torso on the dull side. The lines were clear, and the paint didn't bead up. Mistake to avoid: drawing on the shiny side and then realizing your marker smears. Always test a small corner first.
Hack 2: Use a Craft Knife for Clean Joints
Scissors crush cardboard, especially at curves. A craft knife (like an X-Acto) gives you clean edges that fit together better. For the joints, you'll cut small slits where the limbs attach. Why does this matter? Clean slits mean your brads or string won't tear through. For instance, I cut 1/8-inch slits for the arms and legs of a 10-inch doll. The brads slid in perfectly and the limbs moved smoothly. Mistake: pressing too hard and cutting through the other side. Always place a cutting mat underneath and use light, repeated passes.
Hack 3: Reinforce Joints with Cardboard Washers
Cardboard dolls often fail at the joints because the holes stretch. Solve this by cutting small cardboard washers (circles about the size of a dime) and gluing them around each joint hole. This adds a second layer of strength. Why? The washer distributes the pressure from the brad, so the hole doesn't tear. I used this on a dragon doll that my nephew plays with daily. After three months, the joints are still tight. Mistake: using paper washers instead of cardboard. Paper won't hold up. Stick with corrugated scraps.
Hack 4: Make Poseable Limbs with Brads and String
Brads (brass fasteners) let limbs rotate, but they can loosen over time. For a doll that holds a pose, use a combination: a brad at the shoulder and a loop of elastic string at the elbow. Why? The brad allows full rotation, while the string adds friction so the arm stays where you put it. For example, my ballerina doll can hold an arabesque because the string creates tension. Mistake: tying the string too tight, which restricts movement. Leave a little slack. Test by moving the limb; it should stay in place but still be easy to adjust.
Hack 5: Seal and Smooth Edges with Glue
Raw cardboard edges are vulnerable to moisture and wear. Run a bead of white glue or Mod Podge along all cut edges and smooth it with your finger. This seals the edges and makes them soft to touch. Why? It prevents the cardboard from fraying and adds a little water resistance. I did this on a set of fairy dolls that a preschool uses. They've survived many play sessions and even a accidental spill. Mistake: using too much glue, which warps the cardboard. A thin, even layer is enough. Let it dry completely before painting.
Hack 6: Paint with Acrylics for a Durable Finish
Acrylic paint is the best choice for cardboard dolls because it's flexible and covers well. Apply two thin coats instead of one thick coat. Why? Thin coats dry faster and don't cause the cardboard to buckle. For instance, I painted a superhero doll with two coats of blue acrylic. The color was vibrant and didn't crack when the arms moved. Mistake: using watercolor or tempera, which flake off. Also, avoid painting over moving joints; paint the parts before assembly.
Hack 7: Add a Stand for Display and Play
A simple stand makes your doll easier to display and play with. Cut a triangle from cardboard, notch the top to fit the doll's waist, and glue it to a base. Why? It keeps the doll upright when not being held. I made a stand for a knight doll that my student takes to show-and-tell. It stands on a shelf at home. Mistake: making the base too small, which tips over. The base should be at least as wide as the doll's shoulders. Decorate the stand to match the doll for a polished look.
The Hacks, Step by Step
- 1Gather corrugated cardboard and tools
Find a clean shipping box (not glossy). You'll need scissors, a craft knife, a cutting mat, a pencil, white glue, acrylic paint, brads, and elastic string. Having everything ready saves time. - 2Draw your doll pattern on the dull side
Sketch the head, torso, arms, and legs. Keep limbs separate for jointed dolls. Use a simple shape for beginners—like a gingerbread man outline. - 3Cut out the pieces with a craft knife
Place the cardboard on a cutting mat. Use light, repeated passes with the knife. For curves, turn the cardboard, not the knife. This gives clean edges. - 4Reinforce joint holes with cardboard washers
Cut small circles from cardboard scraps. Glue one around each joint hole on both sides. This prevents tearing when you insert brads. - 5Assemble limbs with brads and string
Push a brad through the limb and torso. For extra hold, tie a loop of elastic string around the brad on the back. Test movement; it should be snug but not tight. - 6Seal edges and paint with acrylics
Run a thin line of white glue along all cut edges. Let dry. Then paint two thin coats of acrylic, letting each dry. Avoid painting over joints. - 7Create a stand from a cardboard triangle
Cut a triangle with a base as wide as the doll's shoulders. Notch the top to cradle the doll's waist. Glue to a base and decorate.
The secret to a long-lasting cardboard doll isn't the cardboard—it's how you treat the joints.
Frequently Asked Questions
What kind of cardboard is best for making dolls?
Corrugated cardboard from shipping boxes is best because it's strong and lightweight. Avoid thin cereal box cardboard, which tears easily.
How do I make the arms and legs move?
Use brass brads for rotation and add a loop of elastic string for friction so limbs hold a pose. Insert the brad through the limb and torso, then tie the string on the back.
Can I paint cardboard dolls?
Yes, acrylic paint works best. Apply two thin coats, letting each dry completely. Avoid watercolor or tempera, which flake off.
How do I keep the doll from tipping over?
Make a stand from a cardboard triangle with a base as wide as the doll's shoulders. Notch the top to fit the doll's waist and glue it to a base.
How long does a cardboard doll last?
With reinforced joints and sealed edges, a well-made doll can last for months of regular play. I've seen them survive daily use for over three months.



Leave a Comment