
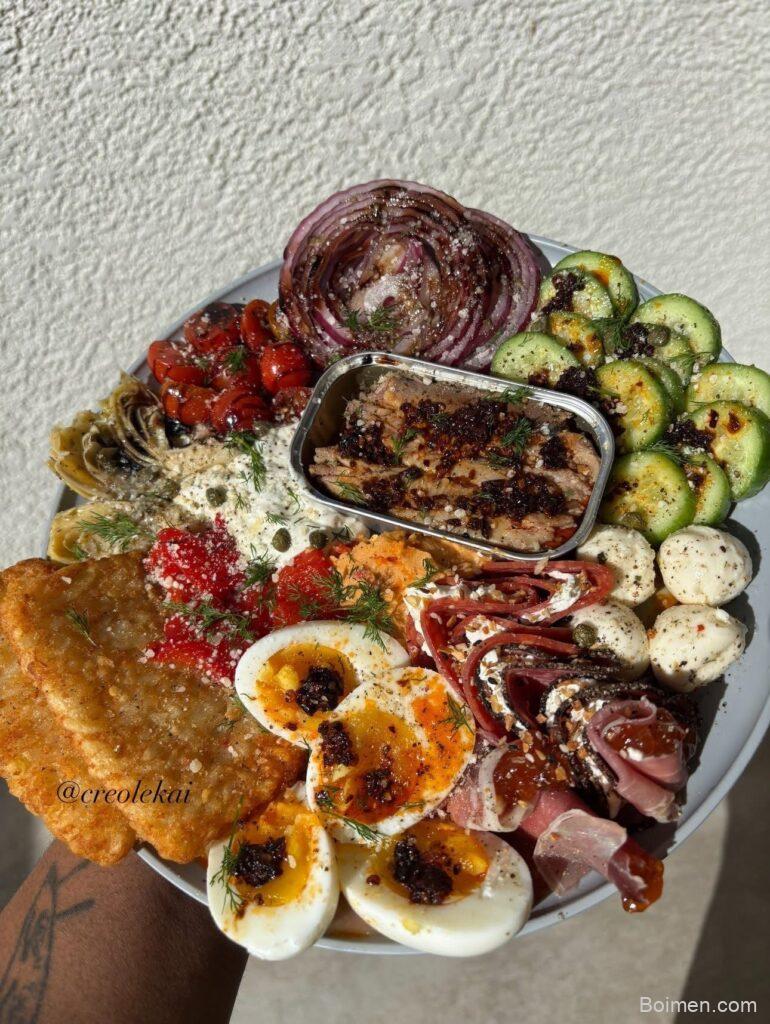
The first time I styled a bowl of soup for a photograph, I stood at the kitchen window at four in the afternoon, watching the light fall like honey across the rim. The image did not just show the soup. It held the afternoon.
Advertisements1
A Pinterest image is not a picture of food. It is a small, quiet invitation. It asks someone scrolling past at midnight to pause, to lean closer, to save it for a day that has not happened yet.
In this guide I will show you how I build that invitation, step by step, with the same calm attention I give to a slow braise. Less, but better.
Why You'll Love This Recipe
About the Ingredients
1 large window with indirect daylight (north-facing is ideal)
Direct sun creates harsh shadows and blown highlights, so diffuse light is your main ingredient. If your only window faces south, tape a sheet of white parchment or a sheer curtain over the glass to soften it.
1 sheet of white foam board, 20 x 30 inches (50 x 75 cm)
This is your bounce card, and it is the cheapest lighting upgrade you will ever buy. A white poster board, a large baking sheet, or even a stretched white t-shirt works just as well.
1 neutral backdrop, such as a marble slab, weathered wood board, or linen cloth
Choose a surface that contrasts with the food, not competes with it. A dark walnut board makes pale pasta sing; a pale linen makes a dark chocolate tart feel rich.
1 small dish of the finished recipe, freshly plated
Photograph the food within five minutes of plating, while edges are still glossy and steam is still rising. Reheat nothing for a photo; it always shows.
3 to 5 styling props, such as a linen napkin, a vintage fork, and a scattering of the raw ingredients
Props should whisper, not shout. A few crumbs, a halved lemon, or a dusting of flour tells the viewer what is inside the dish.
1 smartphone or camera with a 50mm-equivalent lens
A modern phone in portrait mode is genuinely enough for Pinterest. If you use a camera, a 50mm f/1.8 lens is inexpensive and renders food beautifully.
1 tripod or stack of books at counter height
Steady support lets you shoot at a slower shutter speed in soft light without blur. A stack of cookbooks works perfectly.
1 editing app with exposure, warmth, and crop controls
Lightroom Mobile, Snapseed, and even the native Photos app are sufficient. Aim for a bright, warm, slightly lifted image, not a heavily filtered one.
Tips & Tricks
Shoot near the window, never toward it
Place your dish so the light comes from the side or slightly behind, then bounce it back with your foam board. Shooting into the window turns your food into a silhouette.
Crop to 2
3 vertical before you edit: Pinterest displays tall images roughly twice the height of a square, so decide your crop first and compose inside it. Cropping after editing often cuts off the very detail that made the shot work.
Leave breathing room at the top third
Text overlay needs quiet space. If your subject fills the whole frame, your title will sit on top of busy crumbs and become unreadable at thumbnail size.
Pro Tips
Step-by-Step Instructions
1. Find your light
Walk your kitchen at three different times of day and note where the light lands soft and even, without hard-edged shadows. That spot becomes your permanent shooting station, and knowing it in advance removes all the guesswork.
2. Set the stage
Lay your backdrop flat, place the dish slightly off-center, and position the foam board opposite the window so light bounces back into the shadow side. The shadow side should still show detail, never go black.
3. Style with restraint
Add a napkin, a fork, and a few raw ingredients, then remove one thing. The remaining props should frame the food rather than surround it, and the plate itself should stay the brightest element in the frame.
4. Compose for vertical
Switch your camera to portrait orientation and frame a 2:3 rectangle, keeping the dish in the lower two-thirds and leaving calm space above. This is the exact shape Pinterest will display in the feed.
5. Focus and expose
Tap to focus on the most appetizing point, usually the glossiest or most textured area, then drag the exposure slider down slightly so highlights on sauce do not blow out. Slightly dark is always easier to fix than blown white.
6. Shoot three angles
Take one overhead, one at 45 degrees, and one at eye level, holding each for three frames. Shooting three of everything costs seconds and gives you real choices when you edit.
7. Edit for brightness and warmth
Lift exposure by about 10 to 15 percent, nudge warmth up slightly, and increase clarity just a touch so texture reads at thumbnail size. Stop before the food stops looking like food.
8. Add text and export
Place a short title in the upper third in a clean, readable font, then export at 1000 x 1500 pixels. That ratio and resolution keep your image crisp on both phone and desktop feeds.
Delicious Variations
Moody Dark and Dramatic
Use a dark slate or walnut backdrop, place the window light behind the dish, and let deep shadows fall across the front for a restaurant-menu look.
Bright and Airy Brunch
Use white marble, a white linen runner, and shoot overhead in soft morning light for a light, fresh, lifestyle feel.
Process Collage
Stack three vertical frames showing raw ingredients, mid-cook, and finished plate, then export as one tall image for a step-by-step pin that earns extra saves.
How to Store Pinterest image
Refrigerator
Store any leftover food from the shoot in an airtight container for up to 3 days, and refrigerate it within two hours of plating.
Freezer
Freeze leftovers in labeled portions for up to 3 months, then thaw overnight in the refrigerator before reheating.
Reheating
Reheat gently on the stovetop or in a 300 F (150 C) oven until steaming, and never reheat just for a photo, because reheated food loses its gloss.
Frequently Asked Questions
Q: Why do my food photos look flat and dull?
Flat photos usually come from shooting in the shadow side of the room without bouncing any light back. Move closer to the window and place a white foam board opposite the light source to fill the shadows and restore depth.
Set your dish by the window tomorrow morning, wait for the light to soften, and take one slow photograph. Then pin it, and let it quietly find the people who need it. Less, but better.

Pinterest image
Pinterest image is the secret to scroll-stopping food photos that drive clicks, saves, and traffic. Learn the exact lighting, angles, and styling that work.
🧂 Ingredients
- 1 large window with indirect daylight (north-facing is ideal)
- 1 sheet of white foam board, 20 x 30 inches (50 x 75 cm)
- 1 neutral backdrop, such as a marble slab, weathered wood board, or linen cloth
- 1 small dish of the finished recipe, freshly plated
- 3 to 5 styling props, such as a linen napkin, a vintage fork, and a scattering of the raw ingredients
- 1 smartphone or camera with a 50mm-equivalent lens
- 1 tripod or stack of books at counter height
- 1 editing app with exposure, warmth, and crop controls
📋 Instructions
- 1Find your light — Walk your kitchen at three different times of day and note where the light lands soft and even, without hard-edged shadows. That spot becomes your permanent shooting station, and knowing it in advance removes all the guesswork.
- 2Set the stage — Lay your backdrop flat, place the dish slightly off-center, and position the foam board opposite the window so light bounces back into the shadow side. The shadow side should still show detail, never go black.
- 3Style with restraint — Add a napkin, a fork, and a few raw ingredients, then remove one thing. The remaining props should frame the food rather than surround it, and the plate itself should stay the brightest element in the frame.
- 4Compose for vertical — Switch your camera to portrait orientation and frame a 2:3 rectangle, keeping the dish in the lower two-thirds and leaving calm space above. This is the exact shape Pinterest will display in the feed.
- 5Focus and expose — Tap to focus on the most appetizing point, usually the glossiest or most textured area, then drag the exposure slider down slightly so highlights on sauce do not blow out. Slightly dark is always easier to fix than blown white.
- 6Shoot three angles — Take one overhead, one at 45 degrees, and one at eye level, holding each for three frames. Shooting three of everything costs seconds and gives you real choices when you edit.
- 7Edit for brightness and warmth — Lift exposure by about 10 to 15 percent, nudge warmth up slightly, and increase clarity just a touch so texture reads at thumbnail size. Stop before the food stops looking like food.
- 8Add text and export — Place a short title in the upper third in a clean, readable font, then export at 1000 x 1500 pixels. That ratio and resolution keep your image crisp on both phone and desktop feeds.

Ingrid explores Scandinavian minimalist design and slow living. She writes about creating calm, functional spaces with fewer, better things.


Leave a Comment